When I did the 25 days of serverless challenge, it was the first time I used an Azure Cosmos DB with Azure Function Apps. To my surprise, there was actually no official documentation on doing this with PowerShell. So I worked with the globaldocumentation about the bindings and made use of the portal as well as Visual Studio Cod, with the integrated options to create triggers. And I got it working. In this blog post, I want to show you my findings so you can configure your Azure PowerShell Function Apps with Cosmos DB.
What is Cosmos DB

Cosmos DB is a multi-model database service. It can be used to store data that can be available for applications with a very quick response time. The data is accessible through the web portal, through an API or directly from an Azure Function App, as there are bindings available.
There is a free offer for Cosmos DB available for testing or playing around, where you get a limited amount of calls and storage. After that you can have a database starting at about 25 euro (in Europe) at the time of writing.
Find out more about the service here and the pricing here.
An excellent way to get to know the database services is by using the Microsoft Learn Module.
But why?
Why would you want to connect Azure PowerShell Function Apps with Cosmos DB?
This option can be very handy when you want to store data in any way.
Let’s consider an example. Maybe you want to keep track of the growth of your Azure Subscription in a week. You collect all the resources and store them in the Cosmos Database. A week later, you do the same and make a comparison with the data that you have collected the week before, as you collect it from the database.
So Cosmos DB gives you a clean and cheap place to store the data your scripts are working with.
The example for this post
To show how it works, we are going to continue with the example in my previous blog post, where we collected al Azure VMs that are currently running in my subscription. This time, instead of just giving the results back to the user, we will store them in a Cosmos DB.
Prerequisites
You should already be familiar with how to create an Azure Function App with PowerShell. If you are not familiar, I have a previous blog post to help you get started.
You should also be familiar with the Azure portal.
Create a Cosmos DB account
The first thing you need to do is create a Cosmos DB account. In it you will store a database with a container in it.
To find out about the difference between databases and containers, click here. For small Azure Function Apps, one of the important things to remember is that the key you use will give access to the complete account. The bindings will be on a container level.
Another important detail is that the database needs to be based on the SQL API. You can choose different settings, but you will not be able to connect the Function App.
Create a new Cosmos DB by going into the portal, searching for Cosmos DB and clicking Add.
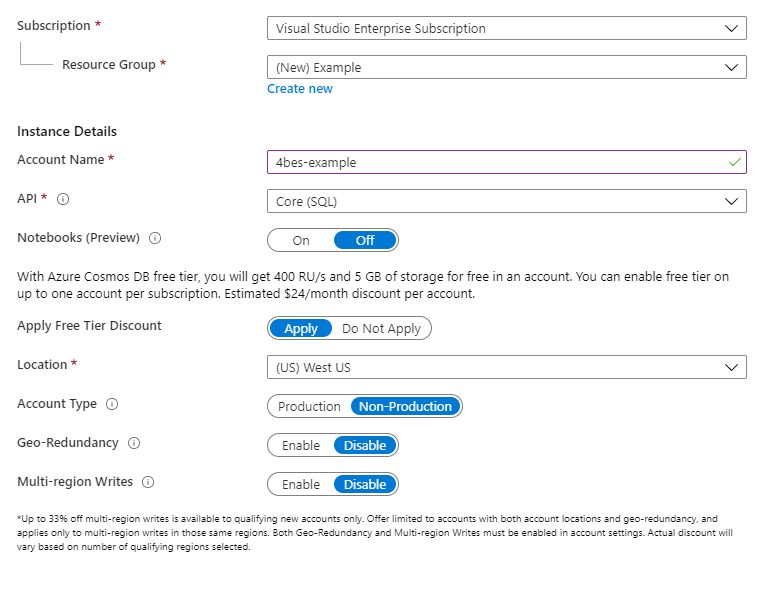
Some notes on this:
– The account name needs to be unique globally
– This configuration is based on test apps, for a production environment you might consider other options
– Because of the current situation with COVID-19, there is a shortage in resources in some Azure regions. For that reason, not all regions are available to create a database at this point. Hopefully in the future you will be able to create a Cosmos DB in a different region again.
For this example, create the account with the settings above.
Create a Cosmos DB Database and container
After the account is ready, you can start creating the database and the container. I will show you how to do this in the portal. If you want to know how to do it with the AZ CLI or PowerShell, check out the Microsoft Learn module.
Note: You can also create (and manage) a Cosmos DB with Visual Studio Code! Find out how here.
Open your Cosmos DB account in the portal and select the data explorer.
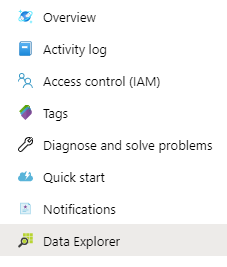
Here, you can see the data that is stored. This view can be handy later when you are testing your app, as you can see what data is entered or changed. You can also manage the items in the container here.
To create a first database and container, click New Container at the top
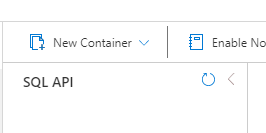
In the menu that follows, you can create the database as well as the container. If you already have a database, you could add containers to it this way.
Choose your own database name and container name. The throughput settings you can leave at the default, click here to find out more about these settings.
For the partition key, in this stage it is best to choose a unique property that all items in your collection will have. I will use vmName.
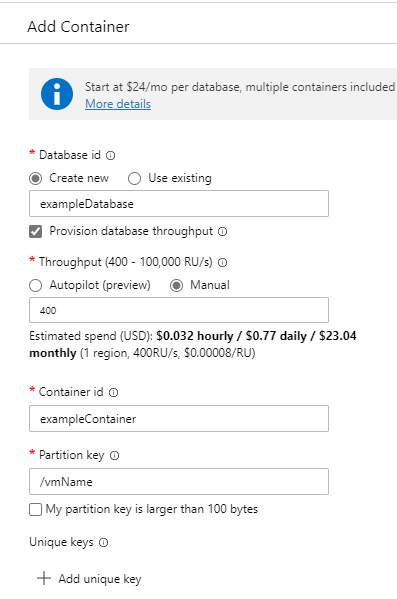
Now you have a database and a container.
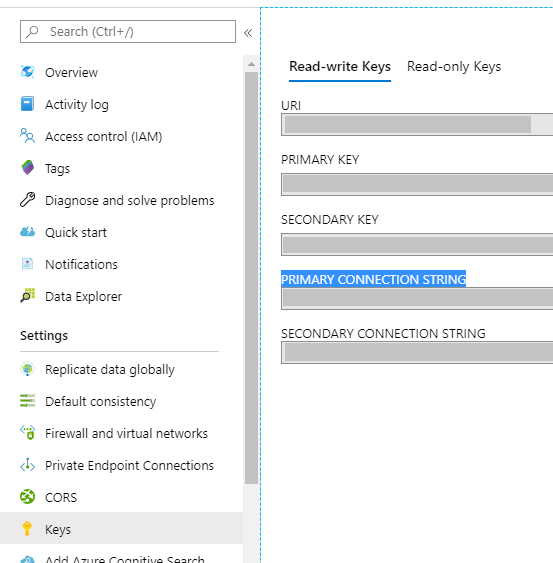
One other thing that you will need later on is the connection string. You can find this by navigating to Keys and selecting the PRIMARY CONNECTION STRING. Copy it for when we create the function app.
Creating the bindings
There are three different ways your Function app can interact with a Cosmos DB: Trigger, input and output.
The settings in the function.json file are very similar:
{
    "type": "cosmosDB",
    "name": "Documents",
    "direction": "in",
    "leaseCollectionName": "leases",
    "connectionStringSetting": "DOCUMENTDB",
    "databaseName": "exampleDatabase",
    "collectionName": "exampleContainer",
    "createLeaseCollectionIfNotExists": "true"
}
Let’s walk through the settings
Type
if you use cosmosDB, the binding will be input or output (depending of the value of direction).
If you use cosmosDBTrigger, the function will be triggered when a new value is added to the cosmos DB.
Name
The name will be the variable you can call in the script, to work with the data.
Direction
in or out. Defines if the binding is for input or output.
Connectionstringsetting
The name of the app configuration where the connection string to reach the Cosmos DB is stored.
DatabaseName, collectionname
The name of the database and container you just created.
Leasecollectionname and createleasecollectionifnotexists
This is where the state of the database is stored, so the function app can keep track of changes. Leases and true are the default values. These are only needed for a CosmosDB trigger, not for input or output.
Use Visual Studio Code
You can also use Visual Studio Code to automatically generate these settings, as you can see in the below gif
If you want to know the exact steps, follow the documentation on Microsoft Docs.
Connection String application Setting
When you create the connection in Visual Studio Code, it will be added to local.settings.json.
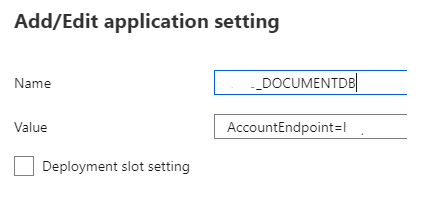
To add the connection to the function app in the Azure portal, go to the Function app Configuration and add a new setting. The name should be the same as the connectionstringsetting, the value should be the connectionstring you copied earlier.
Using the bindings in your script
We’ve got the connection, now we want to use this in the script. Let’s walk through the different bindings.
Trigger
When you use a trigger, a parameter with the name of the trigger (default: $Documents) is added to the script. This will contain only the object that has been changed or added.
The parameters will look like this:
param($Documents, $TriggerMetadata )
Input
When you want to use the Cosmos DB as input, you can add the name of the binding as a parameter. So if for example your function app is triggered by an HTTP trigger, the parameter line of the script will look like this:
param($Request, $TriggerMetadata, $Documents)
You can work with the data by calling that variable, which will be an Array with all entries.
Output
To send data to the Cosmos DB, first you need to create an object that contains the data. After that, you can send it with Push-Outputbinding. In the example of collecting the virtual machines, this would look like this:
$RunningVMs = get-Azvm -Status | Where-Object { $_.PowerState -eq "VM running" }
foreach ($RunningVM in $RunningVMs) {
        $Object = [PSCustomObject]@{
        id = $RunningVM.Name
        vmName = $RunningVM.Name
        PowerState = $RunningVM.PowerState
    }
    Push-OutputBinding -Name Documents -Value $Object
}
The finished app
To see the complete function app, you can visit my Github repository.
Note: to run the function app for yourself, don’t forget to make the app a managed identity so it has access to your VMs.
Another example: A raffle-App
Last week I did a talk on Azure Function Apps for Global Azure Virtual Azure : Serbia.
They asked me to create a raffle page for them, where people could enter their name on a web page. After that, through another function a random winner was called from the entries.
I created this using PowerShell Function Apps with Cosmos DB. You can hear about it in the recording of the talk, which you can find below (talking about the app happens after about 30 minutes, the rest contains more PowerShell Function App goodness).
If you just want to see the code and the slides, visit it on my Github.
Conclusion
So these are the basics on configuring an Azure PowerShell Function Apps with Cosmos DB. I hope this will help you to start using this great option. If you have any questions, leave them in the comments or on Twitter.
Very nice tutorial, it helps me to capture data in Azure Function while documents change in cosmos db.
However, am still looking to find a solution to use AzAccounts module in Azure function so that I cangenerate token from AAD and authunticate user