Last month, Microsoft announced something that was long awaited for: the public preview of Azure Function Apps with PowerShell support. Although it had supported “experimental languages” in v1, now you can run PowerShell Core and the Azmodule in a v2 function app. Those are some great developments that deserve to be explored. Let’s see how you can configure Azure Functions for PowerShell.
In this post, We deploy a function app in the Azure portal so we can get an understanding of how to get started and what’s going on. After that, we will look at the code that we are working with. In the next post, we take it a step further and automate the deployment of the function app with Azure DevOps.
Update: As of November 4th 2019, PowerShell is General Available in an Azure Function App. This means it is fully supported and production ready!
The project
For this post we are going to create a function app that can be called in your browser and displays a list of Virtual Machines that are currently running. We will not bother to much with fancy HTML or CSS (just a little bit). The point is to make use of the Function App and the management capabilities of PowerShell.
Creating an Azure Function app in the portal
When you navigate to function apps in the portal and click add, you get the create menu. Here, you have the option to select PowerShell as the Runtime stack. These are the options we select:
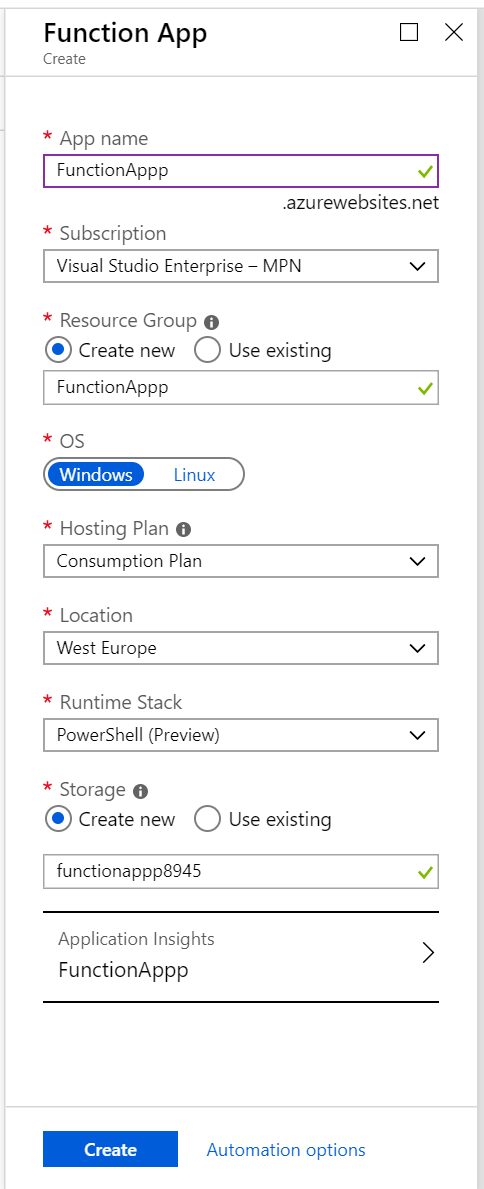
The app name has to be unique. As you can see, it’s an URL. The reason for this is we are more or less creating a web app. With some work it could even become an API.
Choose the Consumption Plan for this lab environment, and for the Runtime Stack of course use Powershell. The names for the storage account and Application insights are filled in automatically.
When you click Create, the Function App should be ready in quite a short time.
Getting started
The first page for a function app is a little different compared to most Azure Resources.
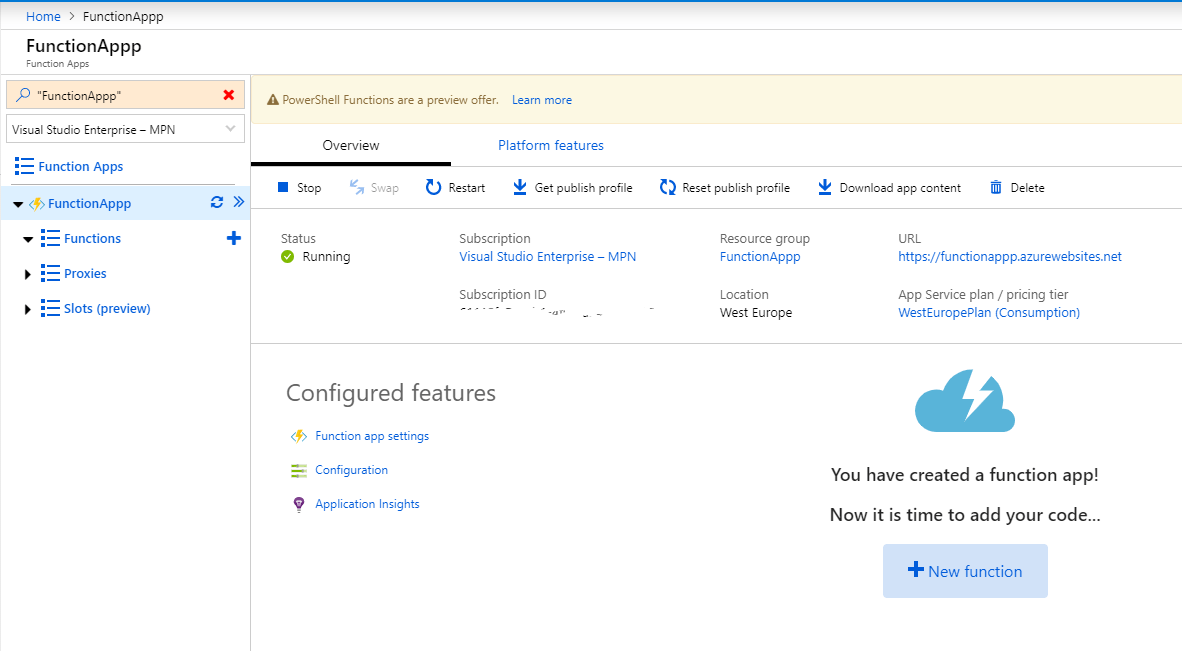
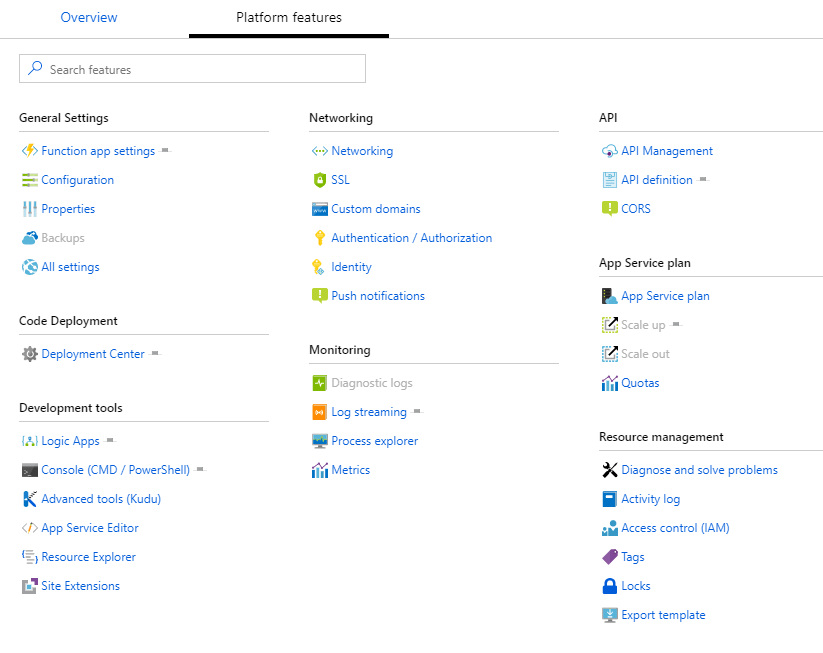
Or is it? If you click Platform features, you will find a few familiar options, like the Resource Management options you know from other Resources.
Return to the overview and click +New Function. The interface gives you a few options to work with. For this first part, we are going to use the portal. Want to use VSCode instead? A full guide is available here.
Create a function
Click in portal and Continue. You now get some options which relate to what will trigger the function.
- Webhook + api
You can trigger the function by making a HTTP request, directly through a browser or by using cdmlets like Invoke-Restmethod. - Timer
The function gets a scheduled trigger - More templates
There are other options available, like having a service bus or event hub trigger the Function.
Choose Webhook + Api and click Create.
Add the PowerShell script
You will now find a PowerShell editor screen with some basic code in it.
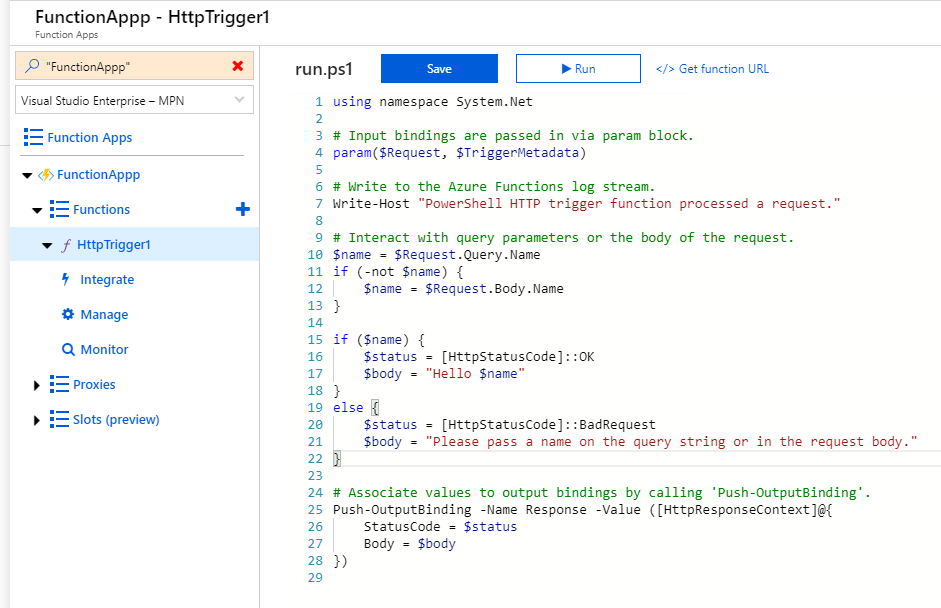
You are free to change the code. Copy and paste this code there.
Click Save. The code is now there, but we need to take some extra steps to get it to work.
Configure the trigger options
Let’s look at our options.
Click integrate in the menu on the left
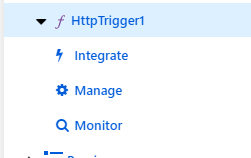
Here you can define the trigger, the input and the output.
At the default screen, you get some options for the security of the Trigger. You can decide if you want to close down some methods to reach the app. For this example you can uncheck the POST method, as this function only needs to get information.
The request parameter name and Route template don’t really matter for this function, they can be useful when you are creating an API-like structure.
The Authorization level is important for security. The default value is function, which means a key needs to be provided to get the information you want. If we change that to Anonymous, everyone with just the URL could get information about our Azure tenant. So let’s leave it at Function.
(Want to use EasyAuth instead? Read about it here).
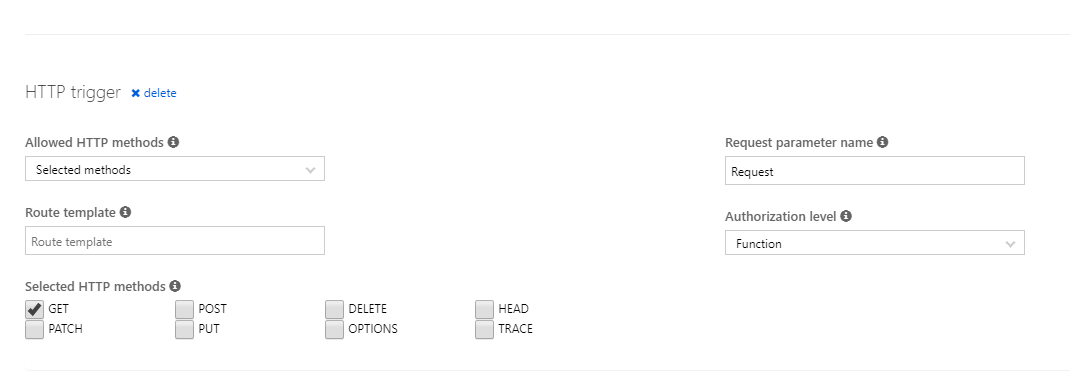
The input and output are left at default for this case.
Now we still need to take care of one thing. The function app is looking at resources in the Azure tenant, but it doesn’t have the permissions to do so. So this function app would fail.
Give the funciton app the right permissions
Move back to the Overview page and click Platform features like we did when we just created the app. Choose Identity and flip the switch to on.
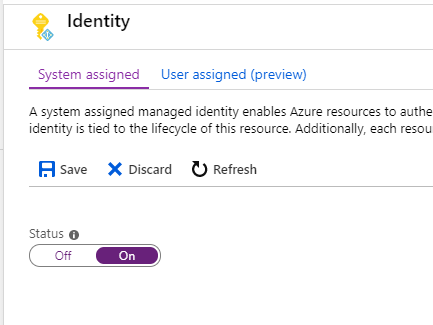
The app is now registered in Azure AD and can be assigned permissions. In this case I want to provide it with Reader permissions at the subscription level, so it can see all VMs and their state. We can create a role assignment as we would with other App registrations
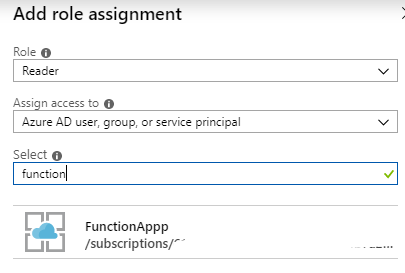
And that’s it. Let’s see it in Action. Go back to the Function App and select httptrigger1. Above the code you can see a link to the URL that calls the function

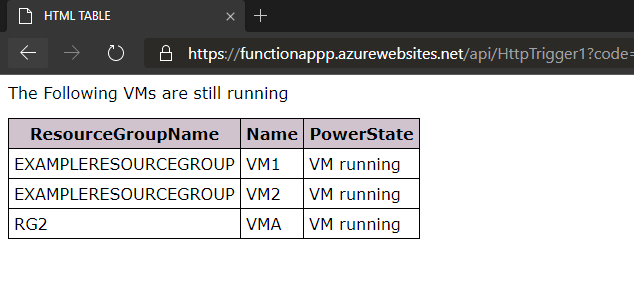
Copy this URL in a web browser and there is the result: a list of all VMs that are currently running in our Azure subscription. It might take some time to load.
The Code
Now let’s take a look at the code for this app, so we can use that as a base for automatic deployment.
Go back to the main overview and click Download app content.
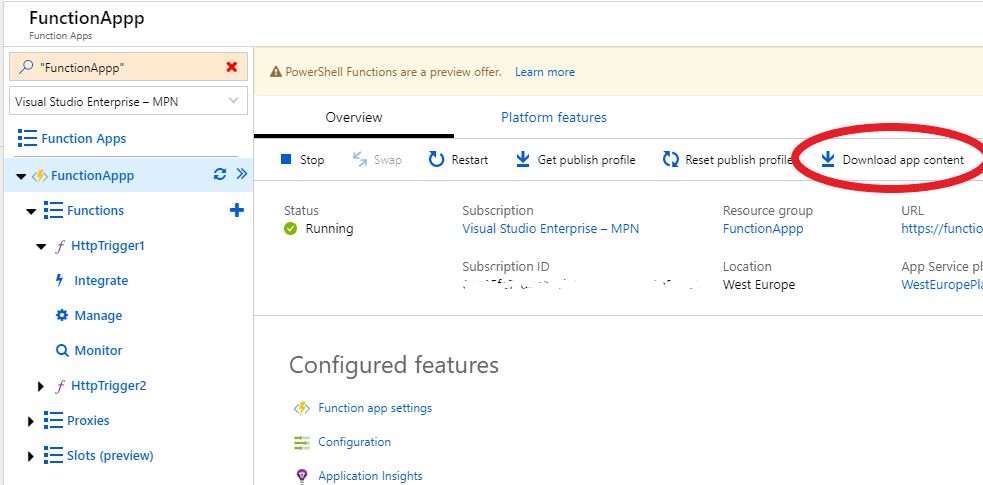
Keep the default values. A zip is downloaded. You can extract it and view the files in VSCode if you like.
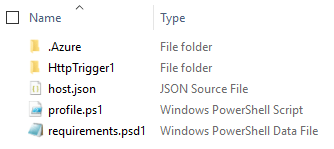
I could explain what the files do, but the Microsoft Docs do a pretty great job at that here.
The most important takeaway is that you have the original PowerShell file and all the other files are to support the Function app configuration and options.
Tips & Tricks
- The AZ Module loads by default. You can disable that in the host.json file
- PowerShell Function apps use PowerShell Core, so some modules may not be working. By default it runs in 32bit, this can be changed
- You can upload modules to the Function App that will be loaded when the App is loaded, So it will always run consistently
- V2 Function Apps have a default maximum run time of 5 minutes. This can be stretched to 10 minutes for an Consumption Plan and unlimited time for an app service plan. To change the time, edit the host.json file under Platform features > Function app settings. Find the syntax here
- To further understand Function app structure, I recommend the Microsoft Learn module
- Want to see examples of Azure Functions? You can use the Serverless Library for free-to-use functions of all kinds. You can find all the code for this post there as well: https://serverlesslibrary.net/sample/3fa19abf-ec81-4adf-b85c-f5917f39359b
Conclusion
I hope by seeing all settings in the portal, you understand how the function app is structured.
In the next post, we take this same app and deploy it through Azure DevOps
Hi there. I attempted this today and ran into a small problem. The role assignments are correct for the function app, and the script was copied directly from your example. The problem is that it doesn’t seem to return any active VMs. I do show the HTML text return, but that’s about it.
I noticed that your example shows “Powershell (Preview)” and mine shows “Powershell Core”. Is there some type of preview runtime environment that I’m not using/seeing?
Hi Gabriel,
This blog post was written when PowerShell as a language for a function app was still in preview. As of november 4th 2019 it has come out of preview, so it will not mention that to you. The functionallity should be the same.
If it returns the HTML text without the table with VMs, then a few things could be happening:
– There are actually no VMs running at that time
– The Managed identity doesn’t have permissions to read the VMs status
– Sometimes when the function is called close to the initial startup of the Function App (so the moment you click Run), this can give a big of a bug where this happens.
So you could try to call the URL again about a minute later.
If that doesn’t help, could it be that you have multiple subscriptions and the VMs are in another subscription?
Pingback:Azure Data Factory: Preventing Concurrent Pipeline Runs – William's IT Blog
Thanks for creating this post. Both, the video and post helped a lot. Is it possible to lazy load the table? If I’m querying >1000 subscriptions is it possible to populate the webpage as the queries progress?
Hi Ayan. That might be a bit of a challenge. What you could do is make use of multiple functions in the app to collect the information. This sounds like a nice use case for a durable function, which I have written about here.