


My previous blogpost described how you can use Logic Apps to send emails from a PowerShell script.
While this is a great tool, I want to show you an alternative method that might be more suitable if you have to handle a large volume of email. In this post, I will show you how to send email from PowerShell with SendGrid.
Update 26/07/2020
Below you can still find the function, but I have now extended the functionality and added it to the PowerShell gallery. This new function includes the option to send attachments. Read more about it in my new blogpost.
But why?
As I explained in my previous post, there has been some discussion on the usage of Send-MailMessage. While Send-MailMessage is functional, it is not guaranteed to be secure if you don’t add your own security measures (like -UseSSL). But more so, the system that is behind cmdlet is no longer maintained, so the system is no longer supported.


So a Logic App could provide a nice alternative. There is a challenge with that method though and that is that it doesn’t scale that well. For example an Office 365 account is limited to 30 emails per minute (Thank you Ludwig for the heads up!). If your needs exceed these limits, it’s a good idea to try SendGrid. The other reason this might be a good way to go, is when you are using an email provider that is not available as a connector for a Logic App.
What is SendGrid
SendGrid is a tool that is often used for marketing emails and newsletters. Along some other services it provides an API and SMTP service that you can use to make sending emails pretty straightforward.


You don’t authenticate against the account you use as the From-address. This means you don’t have to store those credentials. Unfortunately this also means that if you don’t prepare your environment, your email will be marked as unsafe, end up in the spam folder or be rejected (depending on the DMARC settings of the receiving party). And it should, because you are not authorized to use that address.
You do need to create an account with SendGrid, so you are not completely anonymous. But you should have control of the SPF records of the domain you are sending from and use Domain Authentication to make sure your email is not marked as spam.
What should you choose
So if you are wondering which method you should choose, I think the scale of your mailing needs and control of your email domain are the most important factors. If you have to send a lot of emails, or want a lot of variation in the from-address that is used, SendGrid might be a better fit.
To use SendGrid though you do need to be able to change the SPF record for the sending domain. So for services like Outlook.com or Gmail, this will be an issue.
If possible, I would personally prefer a logic app. The reason for this is that I think an SPF record should be as clean as possible. If you have the option to not add an external domain to a SPF record, I would take that option.
Here are a few pointers for both methods that you might want to consider when making your choice.
Logic Apps
- Authenticates directly with a sender account
- Limited to the send limit for personal accounts
- Only works with email services that are available as a connector
- Does not work with Exchange server (on-premises)
SendGrid
- Uses a SendGrid Account, no authentication against the sender Address
- Needs SPF changes and Domain Authentication
- If you have no control over SPF, your email will likely be marked as spam or rejected
I encourage you to try out both options and consider your options with that.
SendGrid
So we are going to use the Sendgrid API for our email. You are able to set up Sendgrid on its own, but for this post we are going to get the service through the Azure portal.
Set it up
To set up SendGrid through Azure, follow the steps in this Microsoft Doc. They are pretty clear. You can use the free tier to send up to 25.000 emails per day at the time of writing. Follow this guide to create an account.
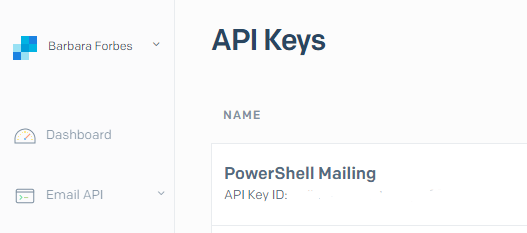
Follow the steps until you get an API key.

Use it in PowerShell
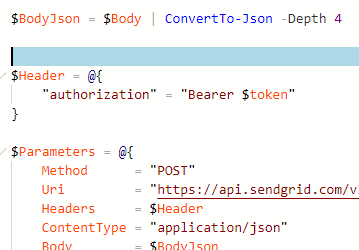
To create an email through the API, we first need to create a Body object. This object contains every property about the email. The Object is honestly a big mess of arrays and hash tables. I have tried to break it up, but in my opinion this did not increase readability.
You can of course use variables for all the different settings. More on that later.
When the object is created, we turn it into a JSON.
We will use this body to give to the API. First we create the header with the token we got from SendGrid. After that, we will call the API
Result
So here is the result, an email send from PowerShell with SendGrid.


As you can see, this email mentions that it is send through Sendgrid and that it is not trusted.
To make sure your mail is secure and not considered spam, see the following guides about changing your SPF record and setting up domain authentication.
https://sendgrid.com/docs/glossary/spf/
https://sendgrid.com/docs/ui/account-and-settings/how-to-set-up-domain-authentication/
Put it in a function
Update 26/07/2020
Below you can still find the function, but I have now extended the functionality and added it to the PowerShell gallery. This new function includes the option to send attachments. Read more about it in my new blogpost.
So as I mentioned, the body-object is messy and variables aren’t used at all now. To make it all a little easier, I have put the SendGrid call in a PowerShell Function that tries to mimic Send-MailMessage. This function is very basic, but it does give you something to build on.
Call it by using the following syntax:
$MailParameters = @{
    ToAddress   = "exa@mp.le"
    ToName      = "Receiving party"
    FromAddress = "ex@amp.le"
    FromName    = "Sending party"
    Subject     = " example "
    Body        = "Plain Text body (user type text/html for a HTML output)"
    Token       = $Token
}
Send-SendGridMail @Parameters


