There is often a use case for sending a email from a PowerShell script. Maybe you want to send an alert that the script didn’t work, or a notice that an account has been created. To take care of this, it can be worth it to make use of the options Azure has to offer. In this post, I will show you how to send email from PowerShell with a Logic App.
Note: While logic apps run in Azure, your scripts don’t have to. You can use these options with your on-premises or hybrid environment.
How about Send-MailMessage
In PowerShell 6.2 and up, a warning started appearing when you use Send-MailMessage.

There was a lot of discussion about if this warning is needed and if Send-MailMessage is really not secure. If you are interested in that, I recommend reading this GitHub Discussion. What is a fact though, is that the system behind Send-MailMessage is no longer maintained, so it doesn’t hurt to look for alternatives.
Using Logic Apps
A Logic App basically gets a trigger, collects data and performs actions with it. This sounds very vague but it gives a lot of possibilities. It’s very easy to set up if you understand basic programming-logic. So if you know Scratch , IFTT or have coded in any language, Logic Apps will be a walk in the park. What we will use in this post is the option to connect to a lot of different services.
Prerequisites and limitations
When you create a connection, you will use an existing account for you email service. This account will be the from-address and needs the permissions or licenses to send an email. This can be through a shared mailbox. In a enterprise environment I would recommend creating a service account that has permissions to send mail and just that.
Not all email providers are available. It is not possible to send email through Exchange on-premises by default.
You are able to use online providers though, like Office 365, Outlook.com and Gmail. For a full list of default connectors, see the Microsoft Docs. If your provider is not available you might want to look into using SendGrid, which is available as a connection.
Flexibility
What I will show you here is an example of how you can use a logic app. You can play around a lot with the formatting and parameters. This is a logic app that counts on the source script to create all the formatting and logic. This Logic App just sends the email, so you could use it for a lot of different scripts. If you want, you could also create specific logic apps for specific scripts and allow the Logic App to handle for example Array-inputs or change the subject based on the input.
Costs
With Logic Apps you pay for usage. Every time the app is triggered, you pay for every action and connection used. This sounds dramatic, but the amounts are very low. For example at the time of writing this post, you would pay ?0.000022 for each action and ?0.000106 for each connection (in West Europe). This means that even if you send 1000 emails every day for a month, you would be spending about 5 euro. These numbers are for this moment and region, so they are just to give you an idea. To see what you would be spending, find the pricing and calculator here.
Step-by-step: Send email through a Logic App
I am going to use a web hook as a trigger for this Logic App.
We will make use of a JSON body so we can kind of mimic Send-MailMessage.
Create the object in your script
We will first create the email object in our PowerShell script, because we are going to use the JSON for the logic app. More about that later.
So in your PowerShell script, create the following object:
Now copy the output of $JSONBody, you will use it in the logic app.
Create the Logic App
Now we create the Logic App.
Create an empty logic app through the portal, as I have described in this blog post. Work through until you have an empty logic app available.
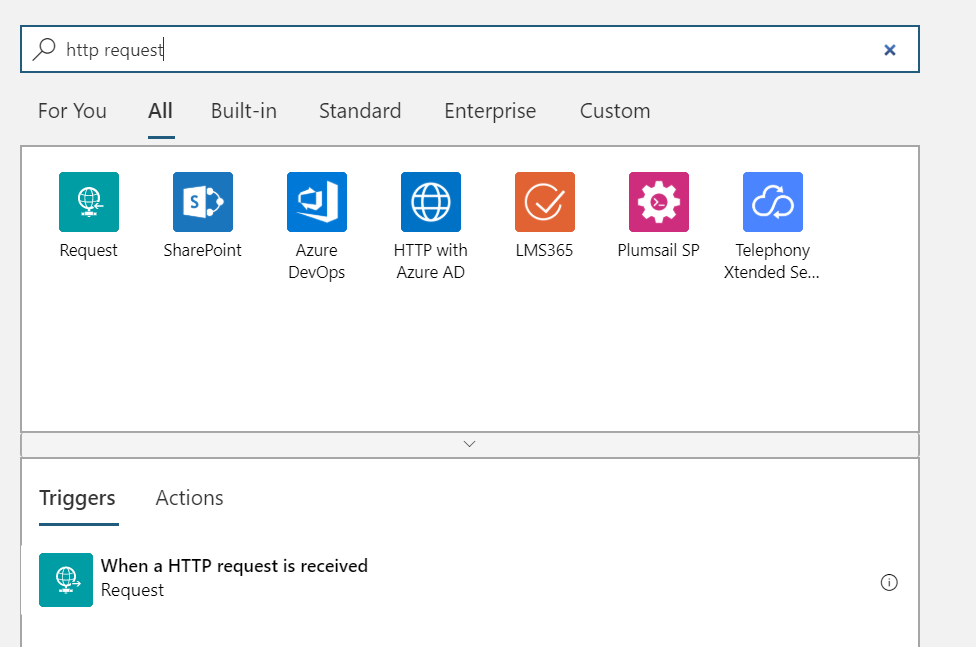
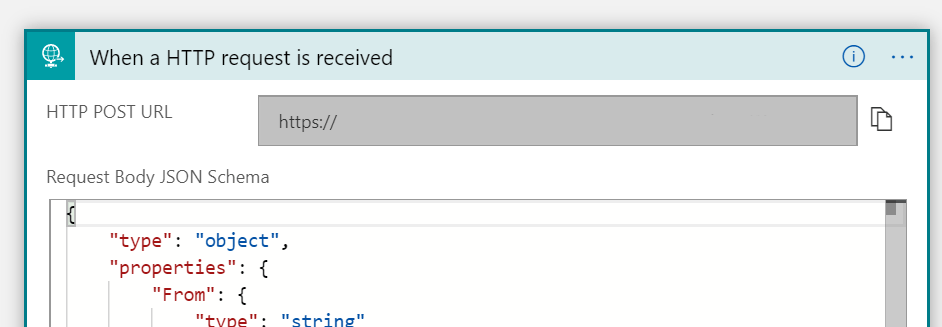
In the designer, search for http request, so you can select “When a HTTP request is received”.
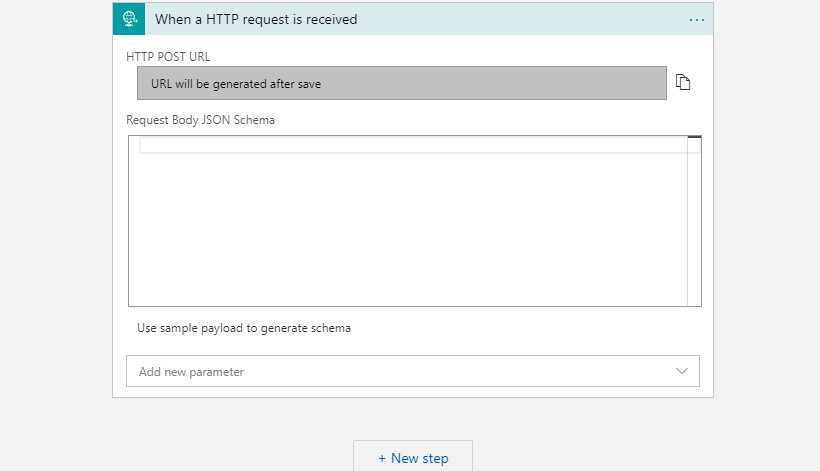
You will now get the option to define the JSON Schema this logic app would work with.
This is where you use the JSON you have created in the previous step. Select “User example payload to generate schema”.
Click that option and paste the JSON we created in the previous step. When you do this, the schema will be generated.
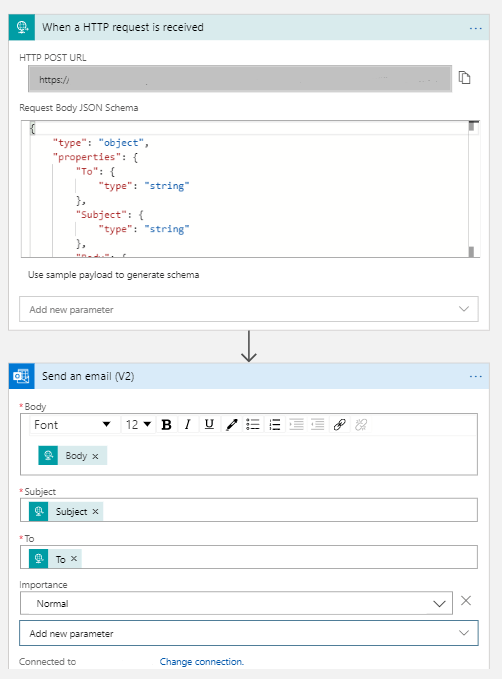
Add the email step to the logic app
Let’s have the logic app send an email with the JSON schema.
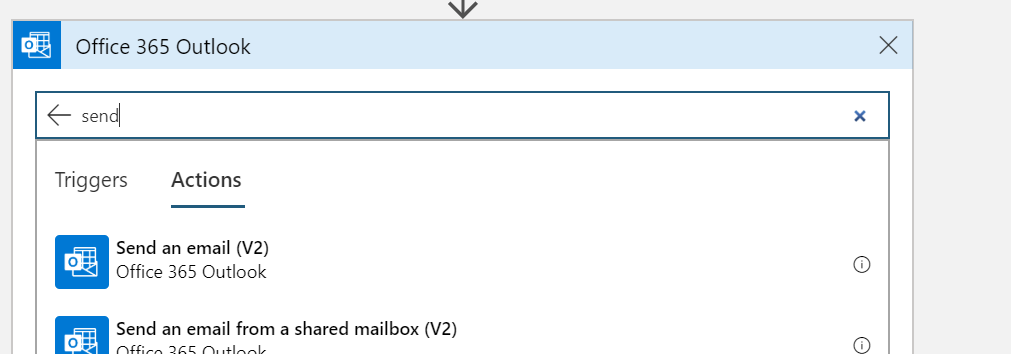
Select “New Step”. Now search for your email provider. There are a few available, like Office 365, outlook.com, gmail or even SendGrid.
For this example I will use an Office 365 Connection. I search for the Office 365 Outlook options and select “Send an email (v2)”
Set up the connection
The logic app asks you to sign in to an Office 365 account that has a mailbox associated with it. I log in to the connection, where I can use MFA if needed.
Note: this connection is stored in the Logic App. While the credentials aren’t visible for people in the portal, the connection can be used for anything a logic app can do. To be safe, I like to use a service account that has a working mailbox (including an OOF reply) to send email and nothing else. The scope for the connection is the Logic App, so anyone with access to the logic app can use the connection.
After you have logged in, you get a pretty basic form to send the email. What you can do now, is add the values that would be in the JSON you create in the PowerShell Script.
When you click a window, You will get the Dynamic Content menu where you can select all the options.
(if no options show, you can click “see more” to get the options you are missing)
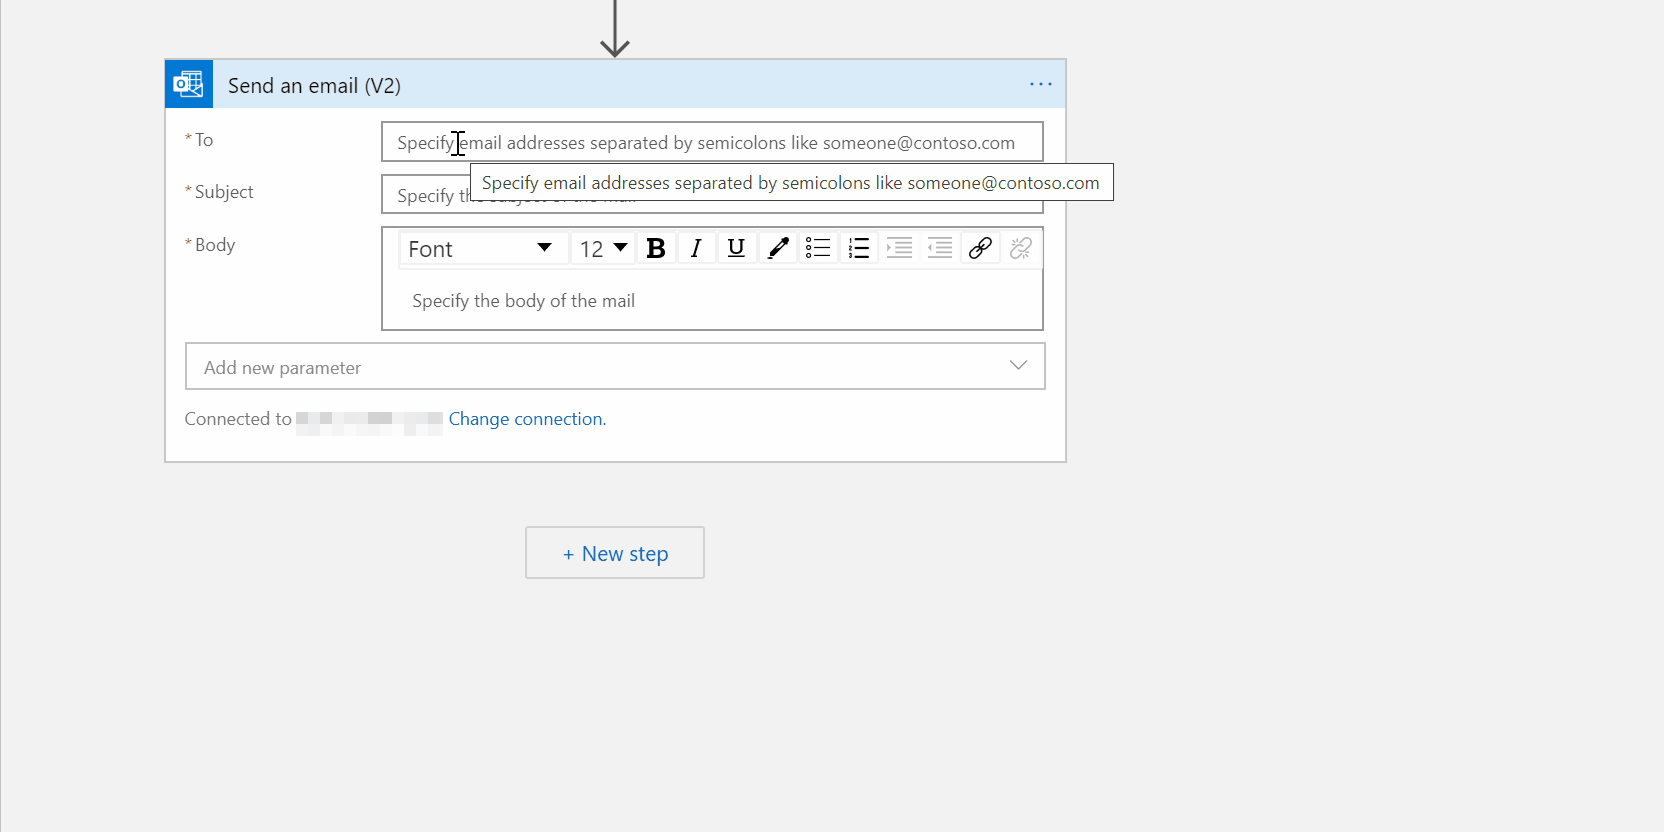
One thing that is not dynamically set, is to add a new parameter called “Importance“.
You can set it to normal. If you do not do this, the email will default to low importance.
After you have filled the fields, click Save.
You now get a link that you will be able to use in a Rest request.
Finish the script
From your script, use the following:
$URL = "[LogicAppURL]"

Invoke-RestMethod -Method POST -Uri $URL -Body $JSONBody -ContentType 'application/json'
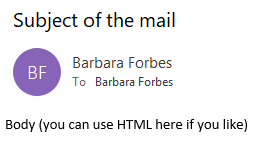
Result
Here is the email. As you can see I have send a email to myself, so sender and receiver are the same.
So this is how you can send email from PowerShell with a Logic App.
This is what the final logic app looks like.
And this is the complete script.
This is very helpful. How do we send attachments using the same script?
Hi Raj,
You should be able to add an extra parameter to the logic app for the step where the mail is send and add the attachment that way. I haven’t tried this out myself
Pingback:logic app run powershell script - trustrose.com
Pingback:logic app to run powershell - infoslist