In my last blogpost, I created a runbook that could schedule another runbook, so I could set timed permissions.
To take it one step further… What if a person could request these permissions without any access to the Azure Portal? In my case, I wanted a person to be able to activate permissions by setting an appointment in their mailbox. All this person had to do, was invite an extra attendee to the appointment. That attendee is the mailbox that’s connected to a Logic App.
A Logic App basically gets data and performs actions with it. This sounds very vague but really, it has so many possibilities. It’s very easy to set up if you understand basic programming-logic. So if you know Scratch , IFTT or have coded in any language, Logic Apps will be a walk in the park.
I will walk through the setup of this Logic App to trigger an Azure runbook with an Office365 Calendar Appointment.
Prerequisites
To start this project, you need:
– A runbook that you want to start. It can accept parameters, which we will set through the logic app.
– A serviceaccount with a mailbox. (it will of course work with your own mailbox).
Create a Logic App
A Logic App in the way we use it is like using flow. It’s very easy to configure, as it is a no-code solution.
Open the azure portal and search all services for Logic apps.
Click Add and fill in the basic information that is asked.
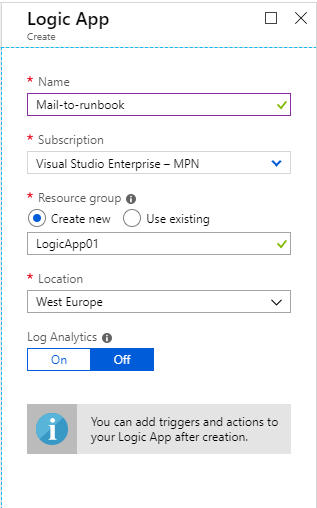
A new screen presents itself and if you have ever used flow, you will see that it’s a very similar screen.
Azure gives you examples for triggers you could use and underneath that different templates for triggers and actions you could run.

These templates are fine to use and make the job even more easy.
The logic we are going to configure isn’t in a template. So let’s choose a blank logic app.

Set a trigger
You can search for the trigger of your needs, by category or by typing in a word. This can take a bit of trial and error, as it’s not completely intuitive and you get a lot of possibilities. For example, when I type in “calendar”, it actually shows Google calendar at first.
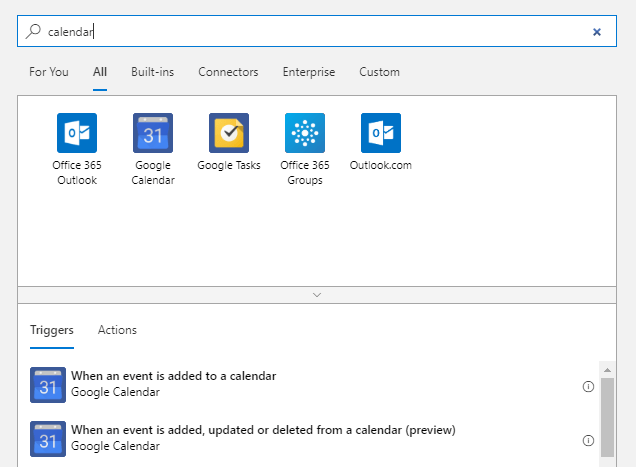
When I search for “event” and scroll down, I find these options:
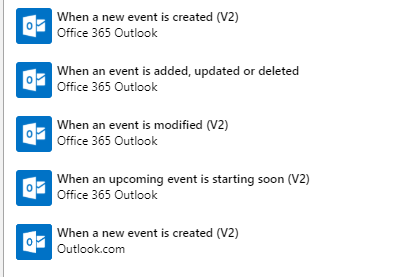
So the flexibility makes it a bit harder to find what you need. We need “event is added, updated or deleted”.
(which is not completely true, we don’t want a deleted event to trigger an action. But we will work around that later).
Azure asks to sign in to the account we need and allow access from the logic app. For this instance, we use the service account with a mailbox.
Select a calendar and how often the Logic app should check if the trigger has returned true (for an added, updated or deleted event). The thing that could be stopping you from checking this every 2 seconds, is that this is where you pay for the app. So if you check every second, it could be adding up. That being said, the cost is quit low. Check it here.
I have changed the interval to twice a day. Now click “New step”.
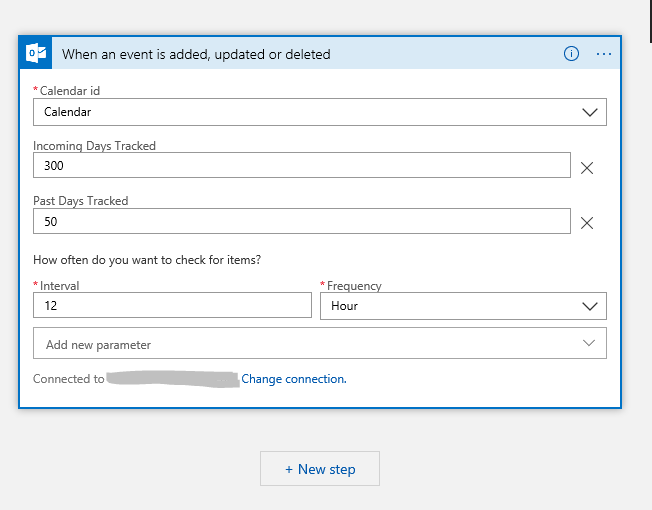
You could just set an action to start the runbook. But this will give two issues:
– It will trigger the runbook when an event is deleted
– Everyone with or without an account in your Azure AD that sends an invite to this account will set of the runbook. What could possible go wrong?
So let’s take care of that.
Set a condition
In the “choose an action”-Screen that opens up, you can select condition within the buildin-controls (as you can see, I get it as an suggestion in the first screen, but if you don’t get that, this shows where to find the option)
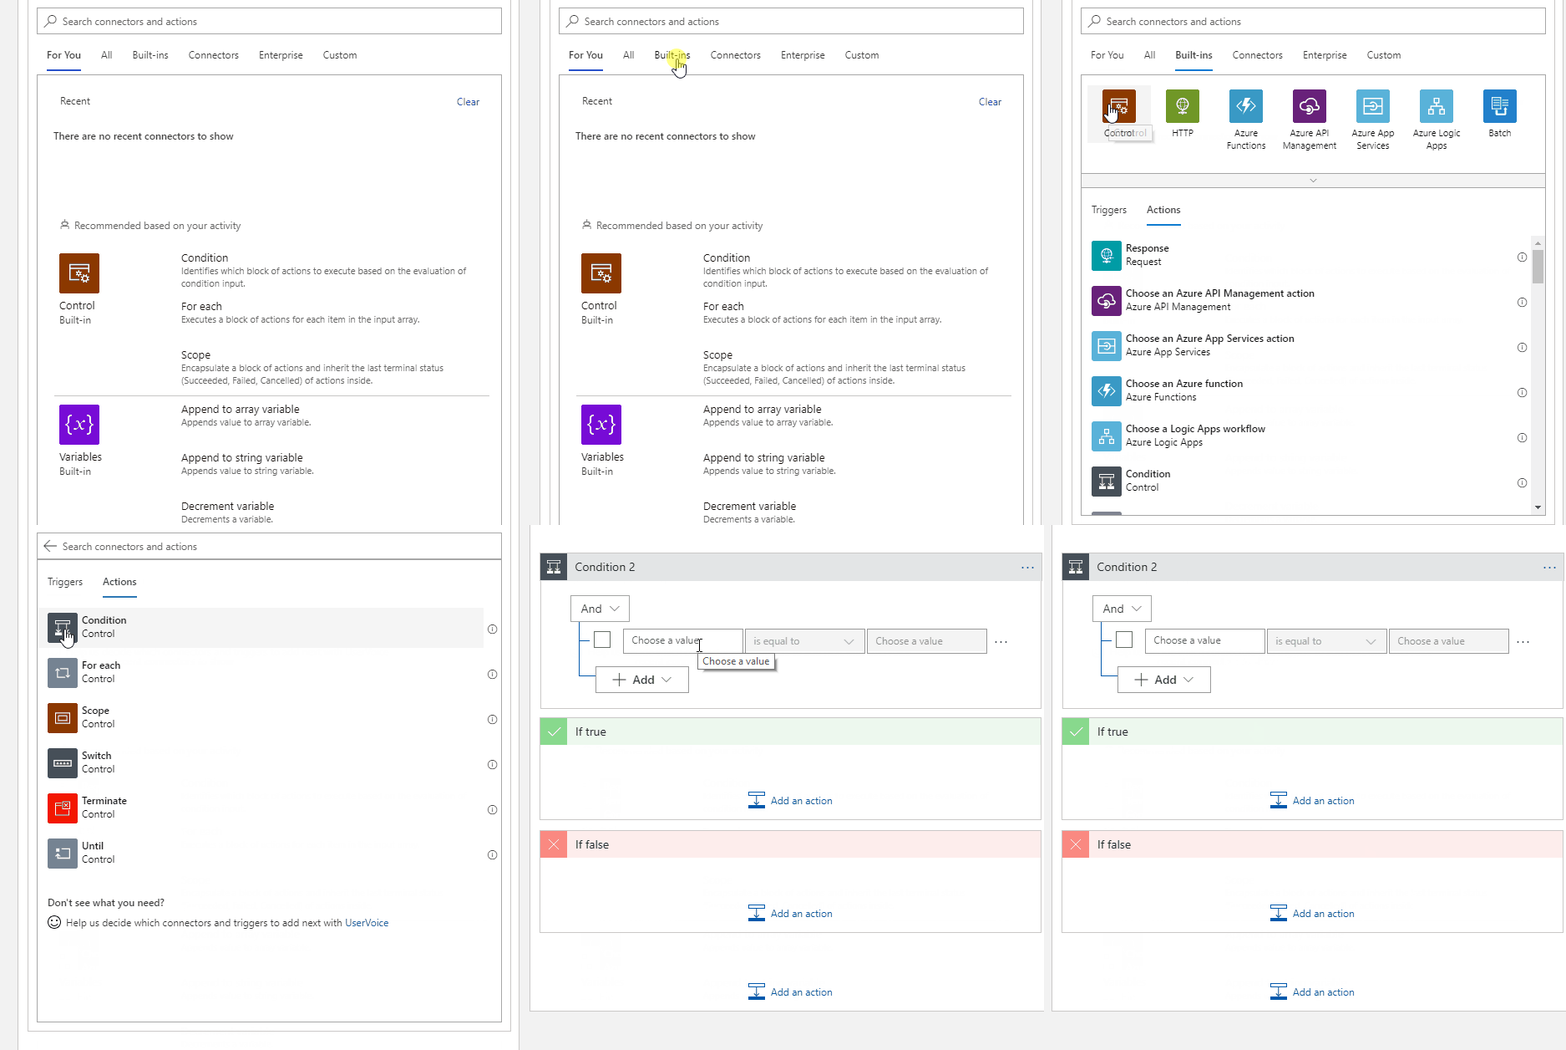
The condition setup is shown

Here you can set multiple conditions
When you click the value-box, you will get a lot of dynamic options related to the calendar-event to choose from.
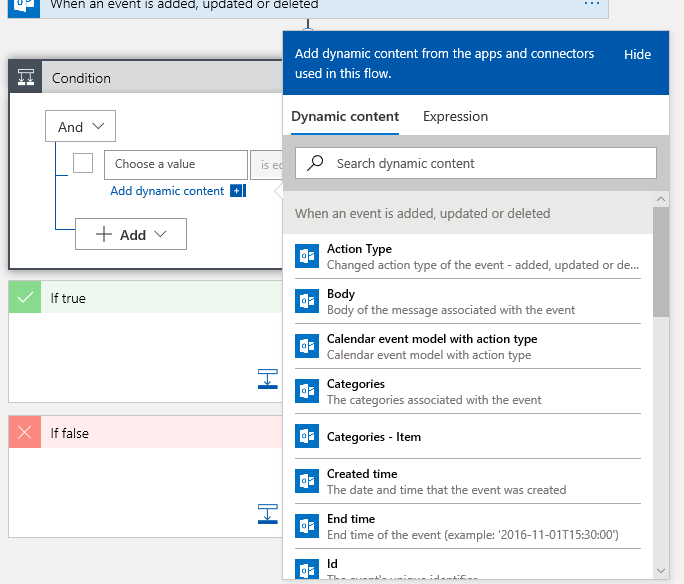
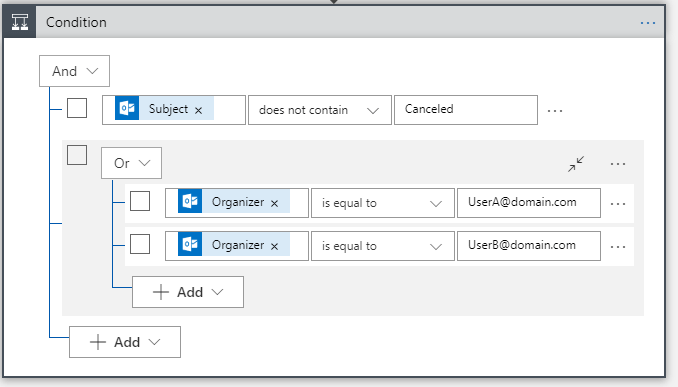
To take care of the issues mentioned above, we set the condition to check that the subject of the event doesn’t contain “Canceled” AND select a few initiators that are allowed to set the appointment. So this is what that will look like:
Set the action
Now that the condition is set, we can add the action to the “if true”-block (the false-block can remain empty).
Within the block, click “add an action”. Start a search for Azure automation and choose to create a job.
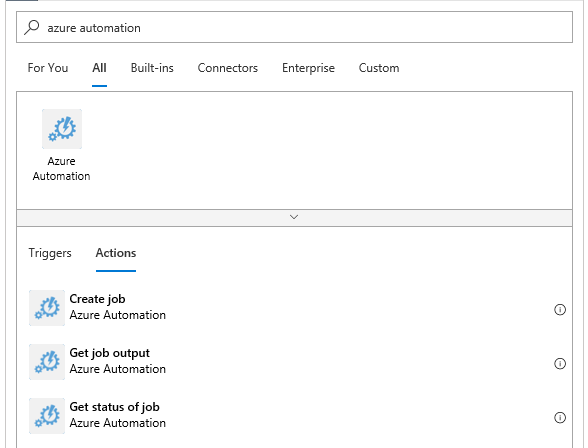
Now you can make the connection and choose the automation account. I highly recommend doing this with a Service principal.
In the menu where you can add a new parameter, choose runbook name.
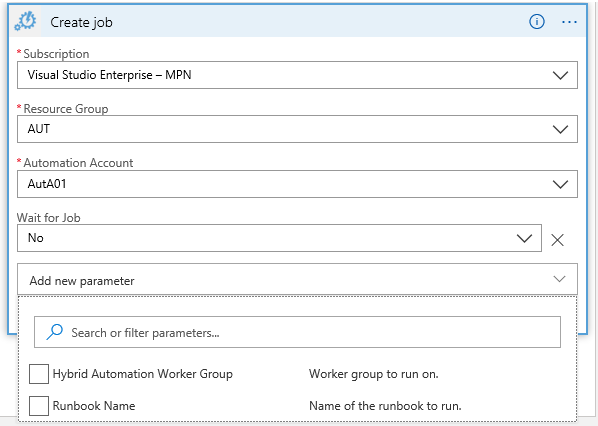
When you choose a runbook that accepts parameters, new fields for the parameters will show up.
In my runbook, I have set these parameters:
Param (
[Parameter (Mandatory = $true)][string]$Resource,
[Parameter (Mandatory = $true)][string]$Users,
[Parameter (Mandatory = $true)][datetime]$StartTime,
[Parameter (Mandatory = $true)][datetime]$Endtime
)
(note how it has a string of users, instead of [array] or [string[]]. The logic App will collect a string, even when more users are selected. Within the script I bring them back to an array by using -split ).
You can choose dynamic contents again to populate the parameters.
As the permissions will be for a limited amount of time, let’s collect the starttime and endtime of the appointments, together with the attendees.
In the end it will look something like this:
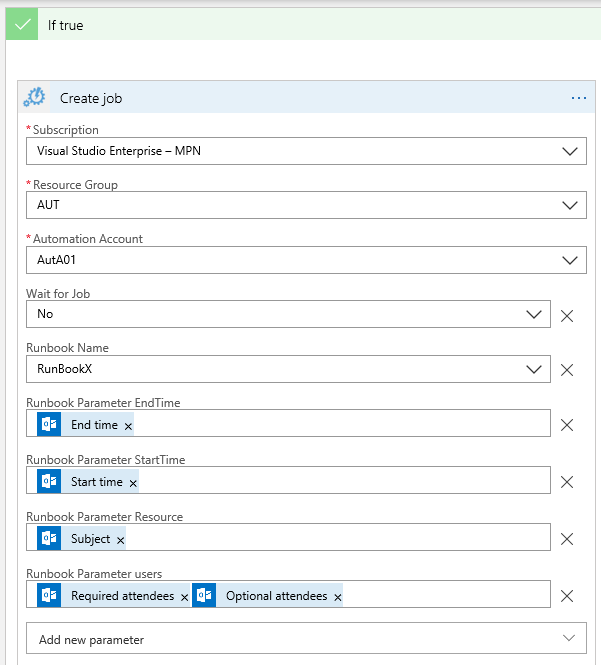
For the resource parameter, I chose to ask the users to include a phrase in the subject and worked with wildcards in the Runbook.
You can save and try the Logic app by selecting Run and inviting the mailbox to a calendar event.
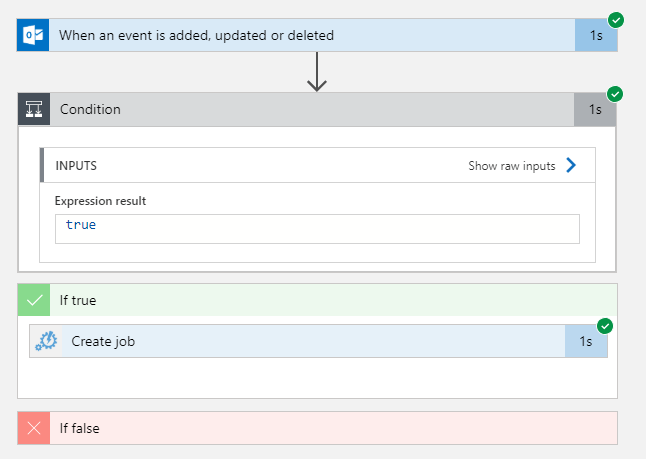
The runbook will now have been triggered with the defined parameters. So this is how you trigger an Azure runbook with an Office365 Calendar Appointment.
The Code
In the menu for the logic app, you can display the code behind the building blocks.
It comes in JSON, in a way that is very similar to an ARM template.
In my opinion, one of the nice things about a logic App is that you don’t need to code. It’s accessible to everyone, simple to use, but provides the logic you can get with code.
To see what the code looks like though, look for Logic app code view in the menu. Here is the code for the logicApp we just created (made anonymous).
Pingback:Automating LogicApp deployment – 4bes.nl
That connection to a calendar is your personal calendar or it is the hole company calendar?
Hello Danny,
For this case I have used a serviceaccount with a mailbox. You can also use your own mailbox or an outlook.com mailbox if this fits your needs.
Regards,
Barbara