Lab-environments, I love them. Clicking around without a care in the world, discovering new things, learning by doing.
Today I want to talk about local labs with hyper-V, using PowerShell Direct. With this great tool, you can send PowerShell-commands to your VMs from your host, even if there is no network connection between the two.
I use this tool to fully automate server deployments for my lab. With this blogpost, I will first get into creating the VMs with differencing disks. Click here to directly move to the part about PowerShell Direct and my scripts.
Both VM as Host need to be Windows 10, Server 2016 or Server 2019 for PowerShell Direct to work.
My personal lab environment
When I quickly want to test something at home, I just use my desktop computer. I have it setup with 32GB RAM and Windows 10 Pro.
That’s enough to run a bunch of servers in Hyper-V, which I build and destroy as needed.
I do have one VM that I keep permanently and that’s a PFSense-firewall. It’s the only VM that has an external switch connected, all the others are only using private connections and go through the PFSense.
This setup is absolutely not necessary for a simple lab environment, I just want to point it out because it means my host doesn’t have a network connection with my lab-VMs. No problem at all!
I’m not going to get into that setup in this post. What I do want to talk about, is how I quickly deploy and destroy server VMs. To accomplice this, I use a VHD and create VMs a differencing disk.
Creating VMs with a differencing Disk and PowerShell
There are a lot of resources available on how and why to use a differencing disk, but this is it in a nutshell:
- A differencing disk is a base image. All VMs that are created based on it will only keep track of changes to that image, which means it’s a timesaver (the OS is already installed) and it’s a spacesaver
- A differencing disk should NOT be used in production, it is meant for testing and labs
To create a differencing disk, follow these steps:
- Create a VM with the OS of your needs, make sure it is up to date
- Create an answerfile to make sure you’re not bugged by standard questions. You can do it here: http://www.windowsafg.com/. The one for server 2016 works just fine with 2019.
You can find my example in the Powerlab Git repository in the folder Hyper-V VMmanagement. Place the file on the VM, I usually create a folder named C:\Temp. - Run sysprep with the answerfile with the following command
sysprep /generalize /oobe /shutdown /unattend:c:\Temp\AutoUnattend.xml
- Think about how you handle the password. I put my password in plaintext in the AutoUnattend.xml. Of course you never ever ever do that in production. Ever. But it works for the lab.
Create a VM from your differencing disk
You can of course create this VM in the GUI. But we wanted some speed. So the basic powershell is like this:
$VHD = New-VHD -Differencing -ParentPath $Parentpath -Path $VHDPath

$Parameters = @{
    VHDPath    = $VHDPath
    Name       = $VMName
    Path       = $path
    SwitchName = $SwitchName
    Generation = $SwitchGeneration
}
New-VM @Parameters
The parentpath there is the path to the VHD or VHDX you created in the previous step.
This is the bare minimum to create your VM. I have put this all together in a function you can find in the PowerLab-Github.
PowerShell Direct
With Powershell direct you can use remote powershell from a host to a VM. Invoke-Command and Enter-PSSesion are both available with the –VmName parameter. This is very helpful when creating a virtual lab that should not have a networkconnection with the host.
Another cmdlet that is part of the HyperV-module and very nice to use is Copy-VMFile. This will allow you to copy a file from the host to the VM. You need to have the integration service “Guest Service Interface” enabled on the VM. The function I created enables this by default.
Note: Unfortunately, the hyperV-module does not work in Powershell Core. Also, remember to run all scripts as admin.
Here, I want to show you some examples of how to make use of Powershell direct. All these examples make use of functions in the PowerLab repository
Set a static IP and change the computername
$Parameters =@{
    VmName = PLDemo
    NewIpAddress = 10.13.0.5
    NewSubnetPrefix = 24
    NewGateway = 10.13.0.1
    DNSServer = 8.8.8.8
    LocalCredential = $localcredential
}
Set-PLVMstaticIP $Parameters

Set-PLVMComputerName -VmName PLDemo -NewComputerName PLDemo -LocalCredential $LocalCredential
Join a VM to an existing Domain
$Parameters = @{
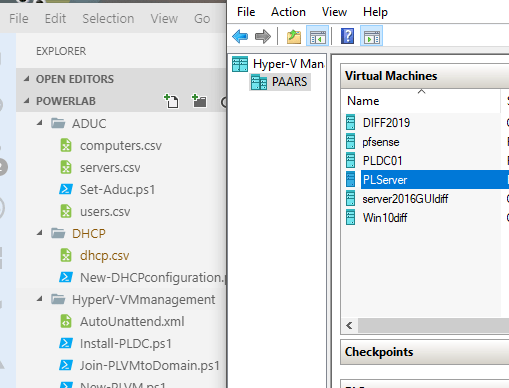
VmName = PLServer
domainname = "demo.lab"
LocalCredential = $localcredential
DomainCredential = $domainCredential
}
Join-PLVMtoDomain @Parameters
Install a domain controller, install DHCP and populate it
For this I’m also using the ADUC- and DHCP-scripts in the PowerLab repository. Read more about these scripts in my earlier post here
As you can see, by combining some functions you can let PowerShell create a lab environment for you in minutes. I hope you can use this for your own lab environment. I am planning to cleanup the PowerLab repository in the near feature, but I need to figure out the best structure for it. In the meantime the scripts are free for you to use.
how to use these cmdlets?
Set-PLVMstaticIP
New-PLVM
I need to install some powershell module?
Hello Joao,
To use these cmdlets, you can use the files that are in the PowerLab-repository. They contain the functions. You can find them at https://github.com/Ba4bes/PowerLab