In every IT environment, you need to consider how to handle the updates to the servers. With Azure Update Management, you get tooling that can help you with a variety of systems: On-premises or in Azure, Windows or Linux. In this blog post, I want to focus on automating part of update management: Scheduling updates. Let’s see how we can Automate Azure update management scheduling with PowerShell.
What is Azure Update management?
For the basics on Azure Update management, I recommend this blog post by Thomas Mauer
What I want to emphasize, is how great Azure Update management can be for a hybrid environment. With this tool, you can start updates for all your Azure VMs as well as on-premises servers. While you are at it, you can start using Azure Monitor as well.
Read more about adding your on-premises servers to this solution here.
For this post, I want to focus on a specific part of Azure Update Management, which is Automatically creating update schedules for VMs through PowerShell
The problem
With the update schedules, you have the option to create reoccurring schedules so you always know when your VMs will be updated. But if you for one reason or another need to create the schedules manually every month, this can become quite a large task. Especially if you have a lot of servers with a lot of different needs.
PowerShell to the rescue! Luckily you are able to automate this process. But in my opinion, the cmdlets and process are not very intuitive.
The solution
So let’s walk through Scheduling an update through PowerShell. The complete script will be at the end of this post.
Create a schedule
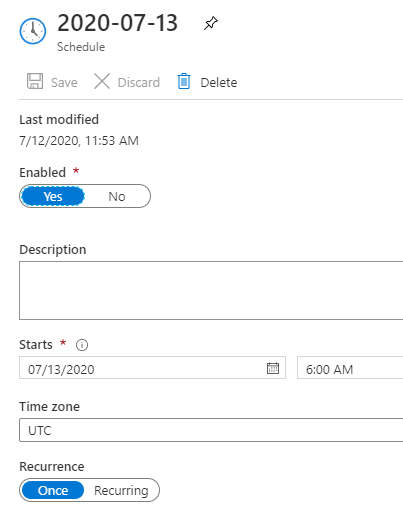
First thing first, we need to create an automation schedule. This is the same schedule that you would use for a runbook. When you create an update schedule in the portal, this is automatically created for you in the background. In PowerShell, you need to create it yourself.
To do this, you need to create a DateTimeOffSet object that shows the date and time which you want to schedule the updates.
Create a variable with Get-Date, like this:
[datetimeoffset]$StartTime = (Get-Date -Date "01-08-2020 07:00")
Now with the Automation Account name and the resource group name, you can set the schedule like this:
By assigning to the variable $AutomationSchedule, you can use it for the following step.

Create the update deployment
Now let’s use the schedule we just created to set up the update deployment. There are a few ways to do this. The simplest way is to pass the VMs recourse IDs to the parameter $AzureVMResourceId. The problem with this is that is doesn’t scale very well and it is easy to forget newly created VMs to the schedule.
That’s why I prefer to use Log Analytics Queries. The tricky thing is that they have to be passed in a different way for non-Azure Computers and Azure VMs. The good thing is that you can use both options in one schedule.
Collect non-Azure computers
To collect the non-Azure computers, you first need to create a Computer Group in Log Analytics. In this query you would call on all the computers you want to update. Here you can find more information about creating that computer group.
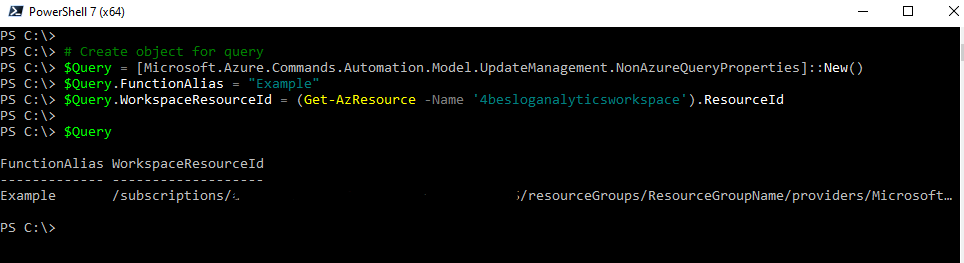
Collecting the query for automation is a bit tricky. You need to create a custom type for it. You can do that with the following code. Replace LogAnalyticsWorkspace with the name of your workspace.

Collect Azure Computers
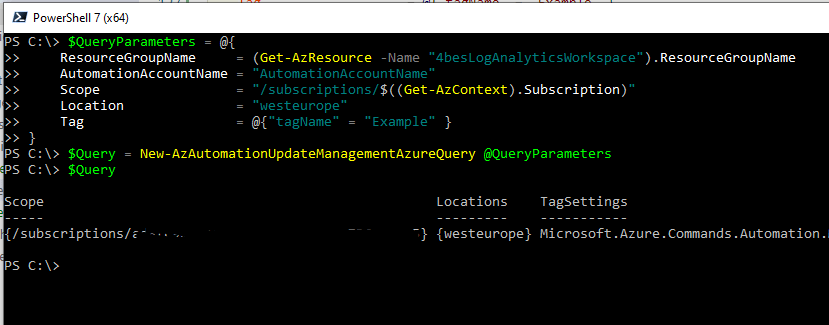
To collect the Azure Computers, you need to create the query with a cmdlet.
To do that, you have to first set the scope for your query. This can be on subscription level or on resource group level. You can select more than one subscription or resource group.
After that, you can optionally add a location-scope or to update only VMs with specific tags. To add them all would look like this:

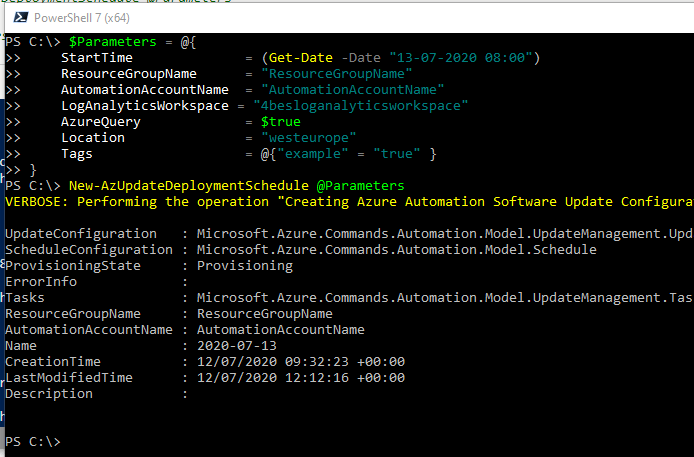
Create the Update schedule
Now you can create the schedule. In this example, you would install all classifications. If you want to separate the classifications, you can remove some of them.
If you want to make use of pre- or post scripts, you can add them with the following properties:
Conclusion
So this is how you create Automate Azure update management scheduling with PowerShell. To make it all a little easier, I have created a PowerShell Function that will do all these steps for you. The script could be combined with a CSV file. You can find it below.