


So you have been working with PowerShell. You hear a lot of people around you talking about GIT and you want to get into the game. But there are so many possibilities, you have no clue where to start. Your not a Dev, you just write small scripts every now and then. Read further, as this is a step by step guide about how to start using GIT, focused on PowerShell.
People who know and use GIT are very excited about those possibilities and will often want to make sure you know about all of them and how they will make your life better. While this is true, I found myself discouraged to start using GIT by the information overload. That’s why this guide is extremely basic and practical. You will learn how to use GIT for your own scripts, as backup and version control.
I will leave out a lot of the possibilities or the why’s. I encourage you to go search for this information yourself, but my goal is to give you enough leverage to start using GIT in your daily tasks.
What is GIT?
We use GIT with scripting and code. The main benefits of Git are:
- Working together on the same scripts in a structured way
- Versioning of the scripts while you are building them
- An easy way to share code and collaborate projects
This is a very very small nutshell to describe it.
If you are completely new at this, please take the time to read this page explaining the basic concepts and the howto from the command line (we will use a slightly different way in this guide). Don’t worry to much if you don’t understand it completely, you can learn a lot by doing.
Github vs Gitlab
By far the best known providers for using GIT are Github and Gitlab. I have tried to come up with a short, objective explanation of the differences, but that proved harder than expected. There is a lot of information online, but a lot of it is dated and a lot of it is opinionated. Truth it that when you are starting out on your own, it doesn’t make that much of a difference.
As GIT is about working together, take a look at what people around you are using. No clear answer there? Flip a coin or try both if it doesn’t confuse you to much. They are a lot alike and can be used side by side. The terminology differs a bit sometimes. I will mention the process for both sites in this guide.
Create an Account
We will start of in the webbrowser to create an account with a GIT provider.
This is very straightforward for both sites. Create an account at https://Github.com or https://Gitlab.com with the “Signup”-option. Choose the free tiers and setup MFA while you are at it.
Interacting with public projects
You could explore public projects on both Github or Gitlab, but I think finding the projects as you go around Twitter, blogs or google is easier. Let’s find a public project that can serve as an example.
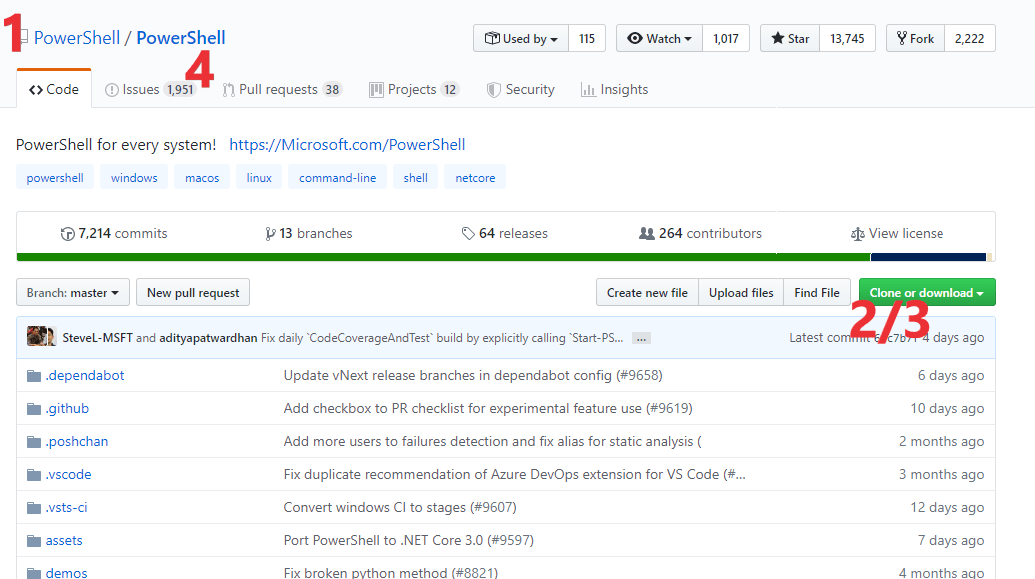
For Github, I can view the PowerShell repository. This is the code that’s behind PowerShell Core:
https://github.com/PowerShell/PowerShell

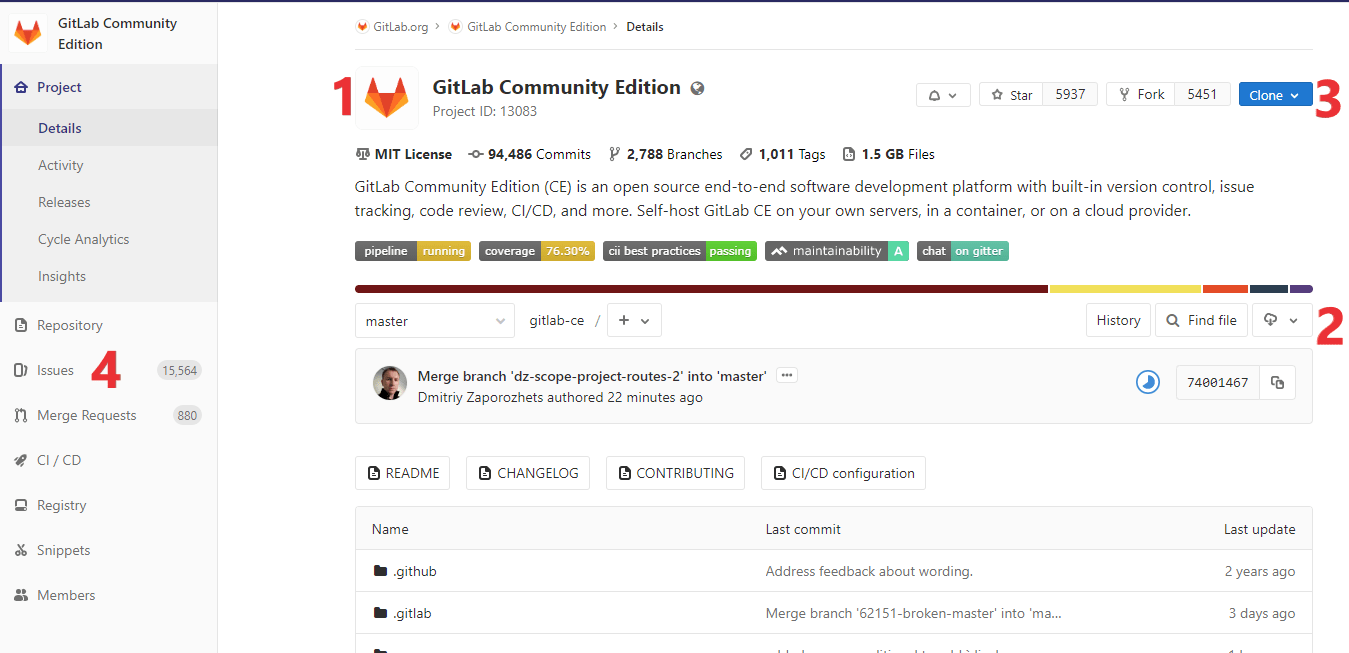
For Gitlab, let’s use The code for Gitlab itself. With this code, you could deploy your own Gitlab server in your environment
https://gitlab.com/gitlab-org/gitlab-ce

You will found some information and options. Underneath you will see the folders and files and then the readme.md. The readme is a file will most of the time provide you with basic information about the project and instructions about how to use it.
Now lets take a look at some elements and possibilities. I have numbered them on both the Gitlab and the Github interface.
1. The title of the project.
In Github this is automatically part of the URL as well. In Gitlab the name and URL can be different, although this is not recommended.
2. Download a project
If you want to use the code in the project without collaborating, you can just download a project to do your own things with it. Nobody can see what you do with it and you don’t need to use GIT technology. You could of course also just copy the code of individual files.
3. Clone a project
When you clone a project, you get your own copy of the code to interact with. You make use of GIT options and it is possible to suggest adding your changes to the original project. We will clone our own projects later on in this guide
4. Create an issue
Say you have downloaded or pulled a script and found some kind of error with it. You can do everyone using the script a great favor by creating a new issue so the script owner knows something is wrong. Just click on Issues in the menu. In most repositories you will find some guidance about what information to provide.
Creating your own project
Let’s start our own project!
On Github, choose New on the left. For Gitlab, choose New Project to the right.


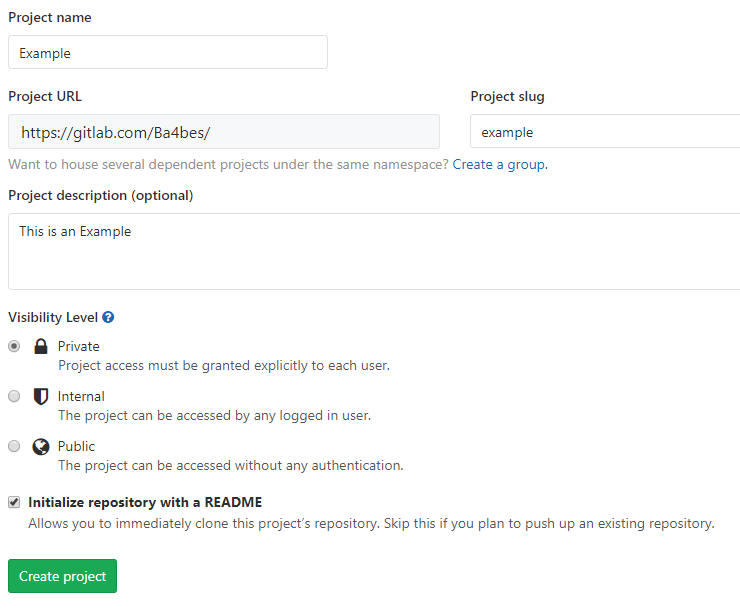
You now get some questions to answer. It all pretty much speaks for itself. Some considerations:
- The name of your project can be different from the URL in Gitlab, but I would advice to keep them the same.
- For visability we want to create a private project. Notice you have the option to create public projects, they will be visible for everyone on the internet
- Check the checkbox for initialize as we will be starting this repo empty.
- Leave other values at the default.
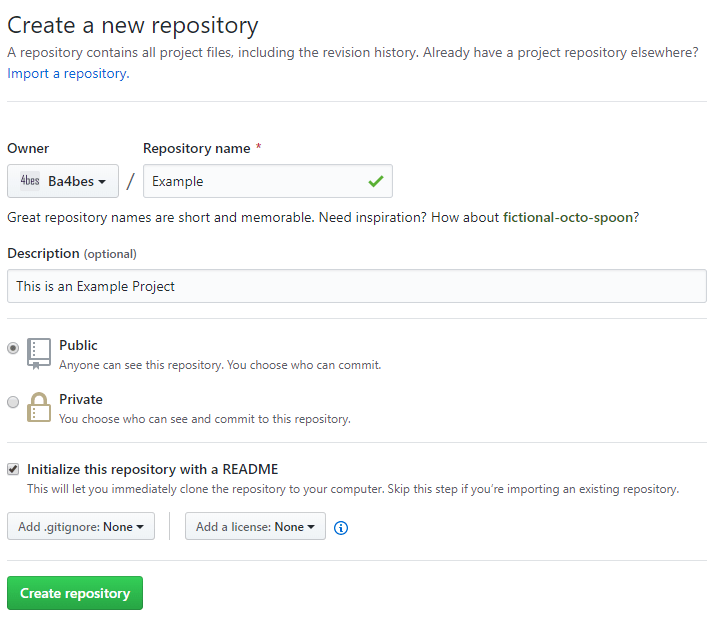
Our repository/project has been created. It is empty now except for the readme.md
(As you can see, Github and Gitlab have slightly different terminology. I will be using Repository to keep it simple. If you use Gitlab, replace repository for Project.)
You could actually just work in the webinterface. You can create files, upload files, change code, all that jazz. This can be very handy for quick and dirty work, but for your daily dev & ops you will want the connection with your local computer.
For now, find the URL of your repository by clicking “Clone” or “Clone or Download” . You need the HTTPS-link. We will use it in a later step.
Let’s first prepare our computer with a few applications that will make this process easier
Get your local environment ready
Let’s prepare our computer with a few applications that will make this process easier
First, you need to download two programs:
- Git:
https://git-scm.com/download/win - Visual studio Code (this is not strictly needed for using GIT, but it will make your life easier in many ways)
https://code.visualstudio.com/
Both are fine to just next-next-finish through the setup. I will not explain all the options for simplicity. You are free to change stuff if you feel you want something different)
Visual studio code
If you have used Visual Studio Code before, skip this part.
Open up Visual studio code. Open your script-folder with file > open folder.
If the powershellprompt is not started, press Ctrl + `
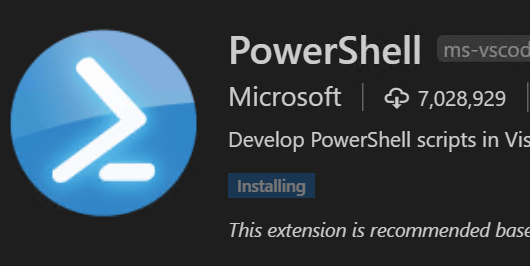
Now, Click on the square at the bottom of the menu (extensions)


Search for PowerShell and install the extension.

The theme will now be changed to Powershell ISE, to make the transition from ISE to Vscode a bit easier. Also a menu is opened where you can change it back to the default theme immediately if you like. I have done this for this guide.
GIT
To check if GIT works, open the PowerShell prompt in VSCode and type git. You should get a help-like output. If you get an error, something has gone wrong.
Open your repository with Visual studio code
We will use a mix of the VSCode GUI and the Git cli, as I feel it is good to familiarize yourself with both.
In the webinterface of your project, you found an URL. Copy this URL.
In the visual studio code terminal, you first need to tell GIT who you are, as it uses your email address to identify you.
So type the following:
Git config --global user.email "you@example.com"
Git config --global user.name "your name"
(you only have to do this once)
After that, make sure your prompt is in a folder where you want to keep your scripts and type:
git clone [URL]
So in my case: git clone https://gitlab.com/Ba4bes/example.git
A credential-screen will pop up. Fill in your Gitlab/Github credentials.
The files in the repository will now sync to your computer


There you go! A new folder will be created with the repository with the Readme in it.
Work with your files
Now let’s use that version control. Open the folder of your repository in Visual Studio Code.
Add a new file through the menu to the left (or copy and paste a script in explorer if you have one ready).
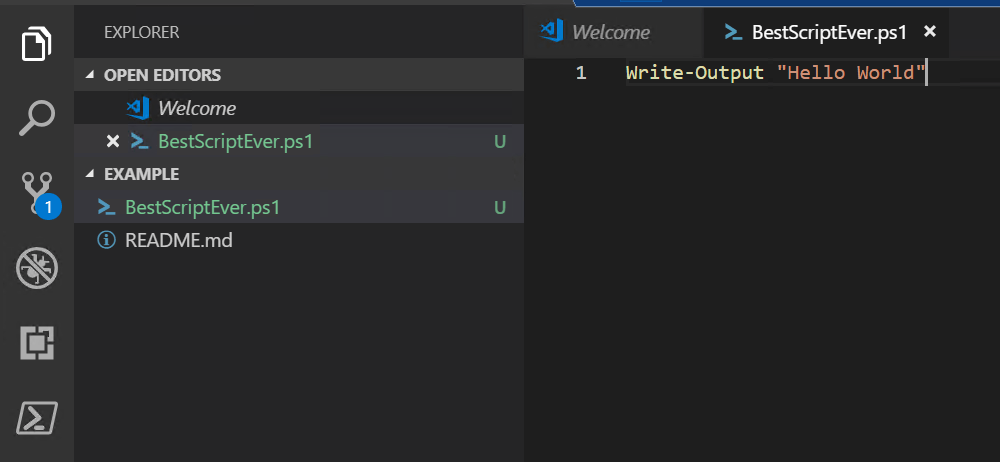

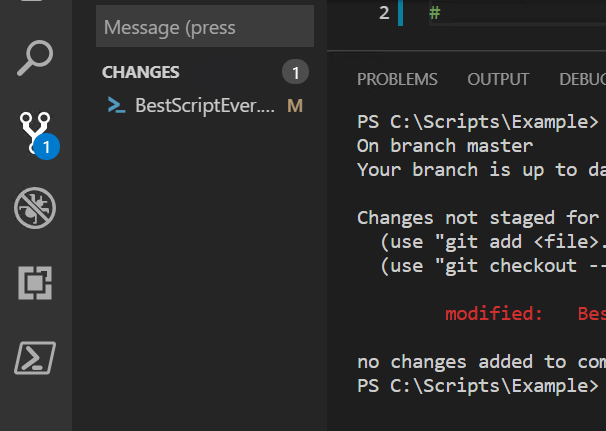
A big “1” appears to the left on the source control logo. This means we have a file locally that is not present in Github/Gitlab.
Let’s commit this new script to the repository. There are a few way to do this, I find this one the easiest:
- Click the source control logo.
- Fill out a message. You tell here what you have changed in as few words as possible. The first commit is often called “initial commit”. Press the checkmark above it to commit your files. You can still take them back at this point, they haven’t been “pushed” to the repo.
The first time you do this you get a message.
This message is related to the fact that pushing an update to Github/Gitlab is officially a three step process. Visual Studio Code suggests here to make it a two step process and for this guide this is a good idea, so click yes. You won’t get the message the next time for this repository.
(if you want to know more about the workflow, you can read about it here)
After this, you click the three dots and select “push”. Now your files are pushed to the repository.

Sometimes git will trow an error at this point. If this happens, you can enter git push at the powershell prompt. It will most times tell you quite plain what you should do to fix it.
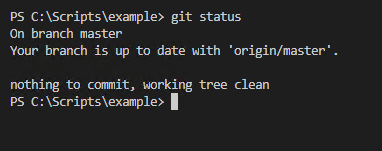
Type “git status” at the prompt to make sure it all worked. It should return that your working tree is clean.

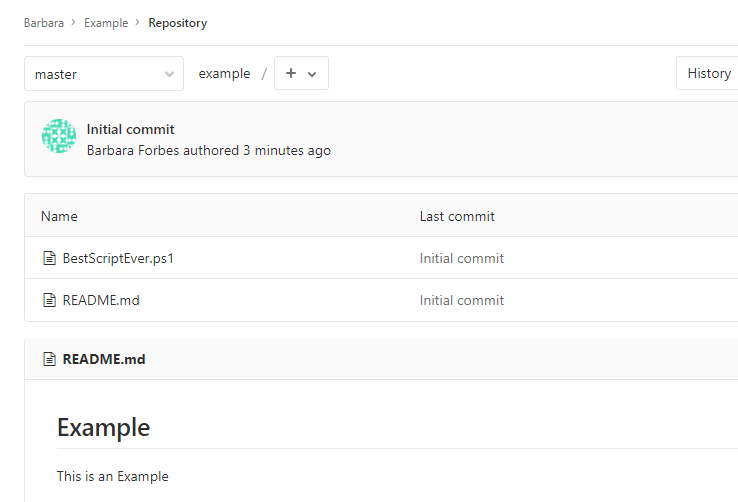
So now I when I open the web interface, my script is there:

Git pull
Let’s say you want to use this repository at another computer as well. Or maybe you have changed something in the web interface, so now your local environment is falling behind. You can fix this by using a pull request. When you use this, you make sure your local repository is the same as the one at the GIT provider.
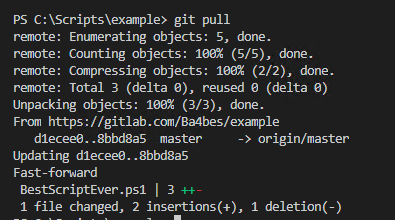
Type at the prompt
Git pull
Newer files will replace your local files as needed. If you had changed a file that also has been changed at the remote repository, Git will tell you there is a merge conflict and allow you to fix it yourself. So it will never throw something away that hasn’t been saved in it’s own versioning.

Conclusion
So this is it, really the tip of the iceberg. There is so much more you can do with git, together or alone. But I found these steps are enough to get started and get familiarized. You will find out all the other options, like branches, merging, fork, fetch and pull requests along the way.
Have fun and let me know in the comments if you have questions.