For this post, I’m going to walk you through creating a custom image with DevTest Labs in Azure. We are going to use a VHD from a regular VM. For the copy action we will consider two methods: GUI and powershell.
Considerations
But why?
In my case I can deploy the VM I need without any extra work using existing Terraform and DSC. Terraform was not able to work with DevTest Lab back then, so this was the quickest way to set up this VM in a lab. Another posibility is that you have a VM running in production that you want to run tests on. For this post we will create a VM manually to have something to work with.
To sysprep or not to sysprep?
The short answer is: Whatever works best for you. You don’t need to sysprep, as Azure will do it for you when you create your image in the lab. On the other hand, some use-cases would not work with sysprep, like a domain controller. In either case sysprepping can be left to after the disk is created, as it is a part of the DevTest Lab-options.
What about artifacts?
Artifacts are a lot of fun and very versatile. it allows you to create a basic image and then run applications or scripts while deploying. There are some standard artifacts and you can create your own. I however would like someone without experience to be able to create an image anyway. If you would still have to learn the basics for artifacts, it might actually be quicker to create an image manually.
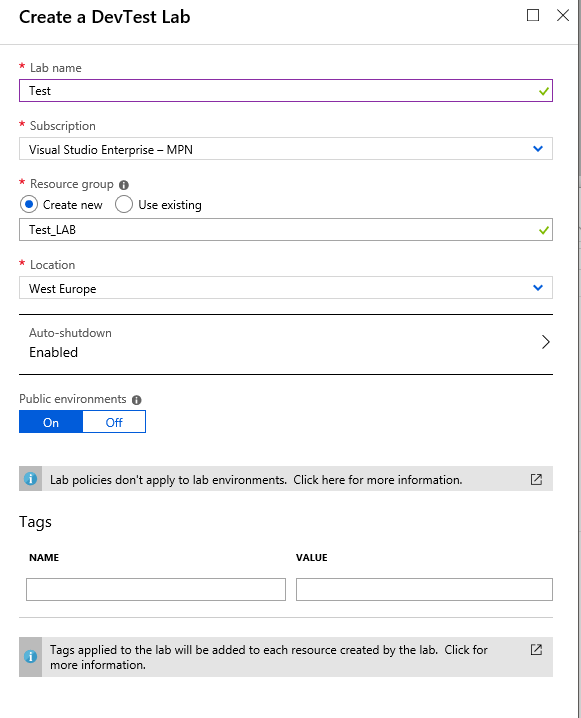
Create a DevTest Lab
Let’s get started. If you haven’t already, create a new DevTest Lab environment. Select DevTest Lab from the “all services section” and click add. You don’t have to bother to much with settings for now, most can be changed later.

Create a VM
Go to Virtual Machine in the Azure Portal and choose add. This menu has changed a bit for the better in the last month. I selected the image server 2016 datacenter. The size is only important if you are going to do a lot of configuration, then a larger size will make things go a lot smoother. As I will not even log in to this VM, a smaller size will do
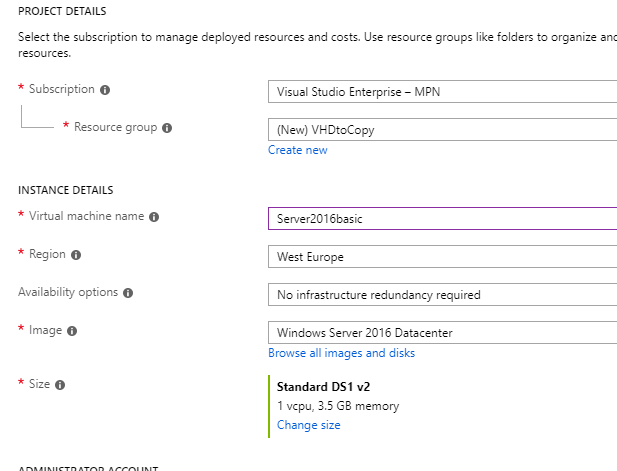
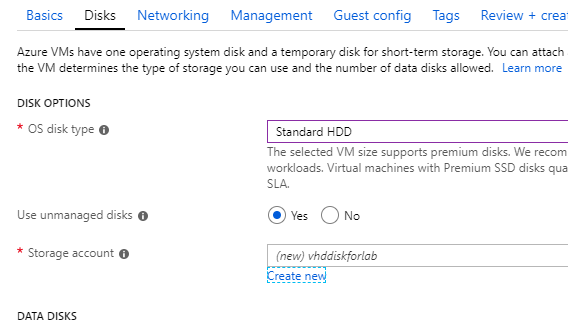
For disks, if you want to use the GUI-method, it is important to select an unmanaged disk as this creates the VHD as a single file, so it’s easier to copy over to the devlab later. This is not supported anymore, but you don’t need support for this VM :). If you are going with the powershell-method it’s no problem to use managed disks.
Note the name of the storage account, you will need it later. I selected HDD instead of SSD to save costs. If you use SSD it will be a faster copyjob later on.
So we wait a while for Azure to create and start de virtual machine. When it’s ready, you can configure all the things and apps you need for your lab-vm.
Now we need to grap that vhd and copy it to the DevTest Lab storage-account.
Copy the VHD
To start the process, stop the VM and make sure it’s deallocated.
Microsoft has some pretty good documentation about uploading a VHD to your DevTestLab. It however seems to assume that you want to upload a local VHD. I just want to move mine from one storage account to the other.
First method: Azure storage explorer
This method is incredibly easy. It has one big disadvantage though: It only works with unmanaged disks and they are not supported anymore. But it’s so easy I will show it anyway. If you have managed disks, move ahead to the powershell section
If you haven’t already, download Azure Storage Explorer and install it. (it’s a handy tool to have anyway)
First, you have to find the name of the storage account of your testlab. This can be done in the portal, just open the storageaccounts-section and search the resourcegroup for your lab. There you will find the name of your storageaccount.
But powershell is easier here and you can use the Cloudshell!
To do this, open cloudshell (make sure it is set to powershell) and use this command (replace $labresourcegroupname with the resourcegroup of your lab):
Get-AzResource |
Where-Object {($_.ResourceGroupName -eq "$labresourcegroupname") -and ($_.resourcetype -like "*storageAccounts")} |
Select-Object Name
Azure Storage explorer
First, go to the storage account you have set for your VM. Go to Blob Containters > vhds (Leased) and you will find the VHD.
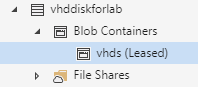
Select it and press the copy-button.
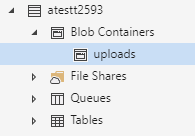
Then, go to the storage-account for your DevTest Lab. If you go to Blob Containers, you will find de folder uploads. If the folder is not there, you can easily create it by right clicking “Blob containers” and creating a new Blob Container. Don’t forget the name has to be lower case.
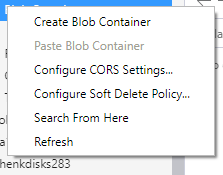
If you place a VHD here, it will become available in de custom-image-menu in Azure.
Select this folder, and press paste.

Wait it’s that simple? Yes it is.
The copy-paste action will take a while though, it’s a large file.
Second Method: Powershell
Powershell can be used here for managed or unmanaged disks. With the lines you see below, you can perform the copy action. You need to provide 3 variables:
I have put the code on Github or you can find it below:
$AzurermSubscription = "[id for your surbscription]"
$VHDSourceResourceGroupName = "[resourcegroupname for the vm]"
$LabResourceGroupName = "[resourcegroupname for the lab]"
$VHDName = "[name for the vhd in the lab]"
#set subscription
Select-AzurermSubscription -SubscriptionId $AzurermSubscription

#get the name of the SourceDisk
$SourceDisk = Get-AzureRmDisk -ResourceGroupName $VHDSourceResourceGroupName| Select-Object ResourceGroupName, Name, DiskSizeGB | Select-Object -First 1
#get access to the disk from this prompt. It will last 5 minutes
$SourceAccess = Grant-AzureRmDiskAccess -ResourceGroupName $VHDSourceResourceGroupName -DiskName $SourceDisk.Name -DurationInSecond 3600 -Access Read

#get the lab storageaccount name to copy to
$LabStorageAcountName = Get-AzureRmResource  | Where-Object {($_.ResourceGroupName -eq "$LabResourceGroupName") -and ($_.resourcetype -like "*storageAccounts")} | Select-Object -ExpandProperty Name
#get the labstorageaccount-key to get access
$LabStorageAccountKey = Get-AzureRmStorageAccountKey -Name $LabStorageAcountName -ResourceGroupName $LabResourceGroupName | Select-Object -First 1
#set up context to run the copyjob
$LabContext = New-AzureStorageContext –StorageAccountName $LabStorageAcountName -StorageAccountKey $LabStorageAccountKey.Value

#perform the actual copyjob
$CopyVHDtoLab =Start-AzureStorageBlobCopy -AbsoluteUri $SourceAccess.AccessSAS -DestContainer "uploads" -DestContext $LabContext -DestBlob $VHDName

#monitor the copyjob
while (($CopyVHDtoLab | Get-AzureStorageBlobCopyState).Status -eq "Pending"){
    Write-Host "Copyjob is still pending"
    Start-Sleep 30
}
Write-Host "copyjob is done"
Create a custom image
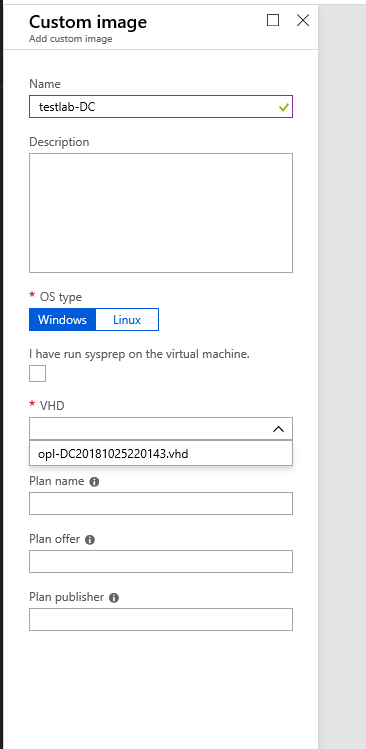
At this point, go to the Azure portal and to your DevTest lab. Select Configuration and Policies > Custom images and choose Add.
In the next menu, you should find your VHD in the dropdown menu. If it is not there, wait around a bit, it can take some time for Azure to progress.
Here the sysprep-options I talked about earlier comes into place. If you want to run a sysprep, this is the moment, don’t select the option “I have run sysprep on the virtual machine”
If you don’t want to have the VM sysprepped, do select this option. This will keep the VM like you left it. Do remember that the standard-logincredentials will not work, you will need to use credentials you have set in your VM.
Now, you have a custom image you can use in the lab environment. You can choose to create a claimable VM with it, or let users create their own VM based on this image.
create VMs
For this usecase, I created two claimable VMs
And that’s it. This is just one small part of all the options DevTest Labs have to offer, so don’t hesitate to go on and find all the possibilities