In September 2020, Project Bicep was introduced. A new and more simple way to author ARM templates. By March 2021, Bicep had grown to an officially supported solution. While there is still work to be done and Bicep is still in preview, this tool is a serious contester for Infrastructure as Code. In this post, I want to show you step by step how you can deploy Bicep with Azure DevOps pipelines.
Note : this project is currently in preview and development is still going very fast. In the future, there might be other ways to reach the goals in this post. I’ll try to keep it up to date.
How can you get started with Bicep
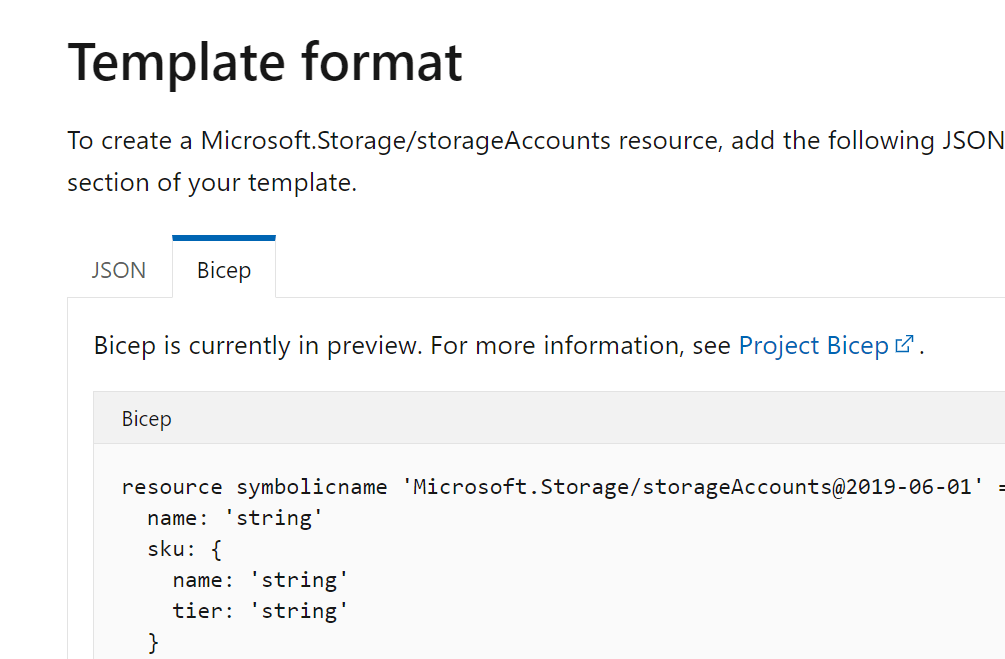
If Bicep is a completely new concept for you, I recommend taking a look at the official documentation in the GitHub repository. Follow along with the tutorial to get a head start. Another great option is to follow the new Microsoft Learn module for Bicep.
If you are already familiar with ARM templates, you will find in the Microsoft documentation, that most references now also contain a tab for bicep templates.
What’s in this guide?
There are a few different ways to deploy Bicep with Azure DevOps pipelines. For this example, we will first build the ARM template that is created by Bicep and store it as an artifact in the pipeline. This way you can always go back to old runs and see what exactly was deployed. After the build, the recourses in the bicep file are deployed to Azure.
To work with Bicep, we will make use of the Azure CLI. The reason for this is that we will not have to install anything on the Microsoft hosted agents, so that saves a lot of time. If you use your own hosted agents, you need to install Bicep on there with the AZ CLI.
Prerequisites
Before we can start with the pipeline, we need to have some things in place.
Create a connection to Azure
To deploy resources to Azure, we need to create a service connection in Azure DevOps. To find out how, you can follow my blogpost on how to do it manually or you can make use of the PowerShell function I have written.

Create a repository
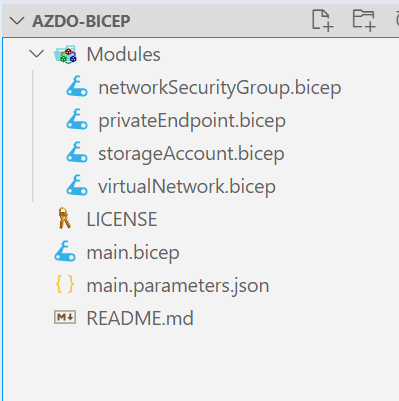
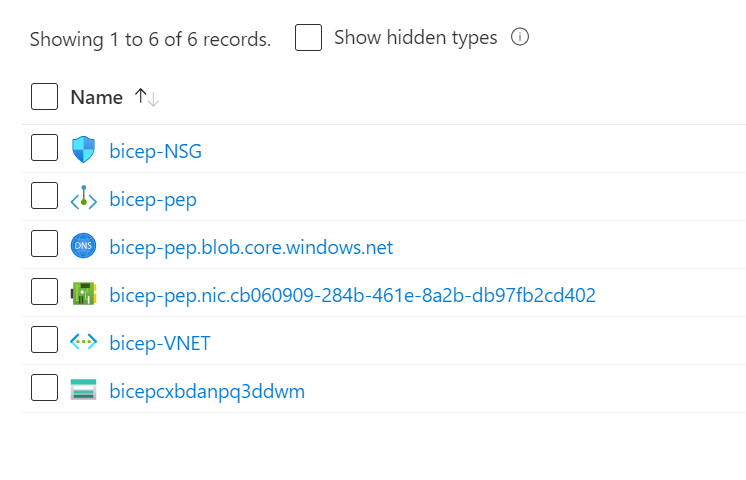
To deploy Bicep, we need a repository with Bicep files in them. To show this process, I have created a repository with a main bicep file, a parameter file and three modules. The deployment will contain a Storage Account, a Virtual Network, a Network Security Group and a Private Endpoint for the Storage account in the network.
You can find the repository here on GitHub. Fork this repository to your own GitHub or copy it to your own Azure DevOps repo.
Note: there is an example of the Azure DevOps pipeline in the repo. You can ignore that if you want to follow along with this post, as we will create a new one.
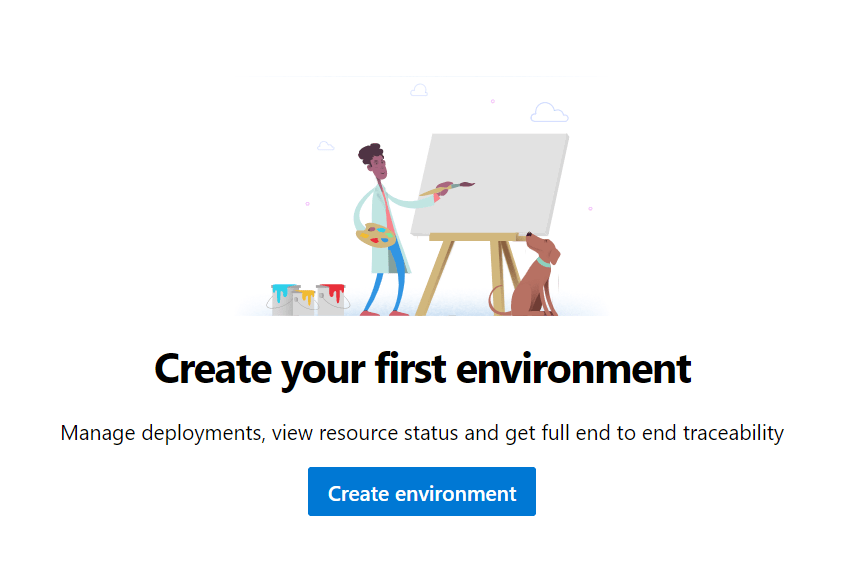
Create an environment
We will make use of a deployment job in Azure DevOps. This clearly distinguishes the deployment stage from the build stage. It will also give benefits like the option to implement a manual approval or even to change deployment strategy. We will not make use of all those options, but will implement the base. To find out more about what a deployment job is and does, click here.
To make use of the deployment job, we first need to create an environment. Open your Azure DevOps project and in the menu select Pipelines > Environments.

Click Create environment
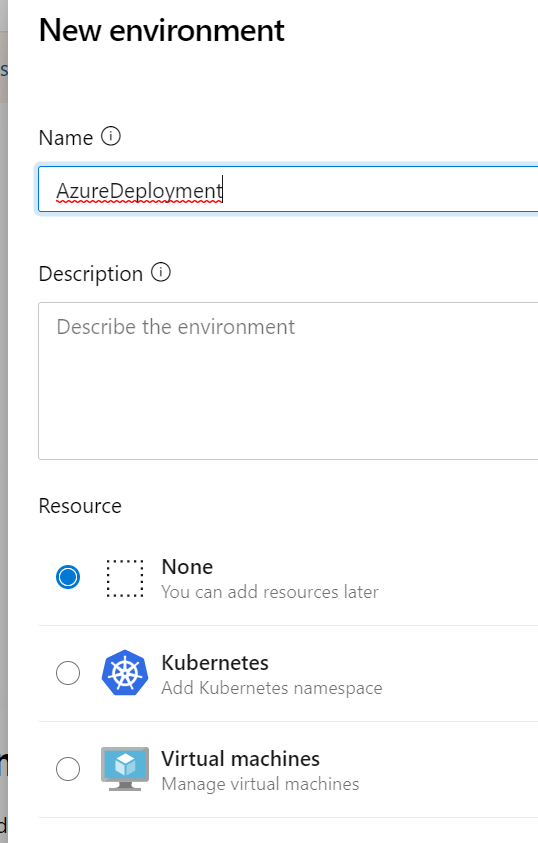
Now give the environment a descriptive name, for this example I use AzureDeployment. Leave Resource at None. Click Create to activate the environment.
Your environment is now ready. This gives you some extra options when deploying to Azure, but for this post we will leave it like this.
Create a new pipeline
(these steps are pretty much the same as the steps in my previous post about deploying ARM templates through Azure DevOps. If you are familiar with the setup of a YAML pipeline, you can move on to the next part by clicking here.)
We now start with the pipeline. In the menu on the left, open Pipelines and then again pipelines
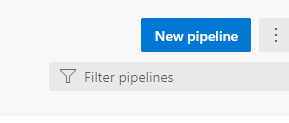
Click Create Pipeline to get started.
If other pipelines already exist in this project, you can find the same button at the top right.
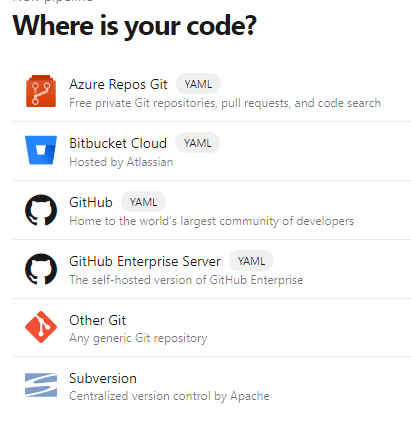
Click Azure repos Git or GitHub, depending on where you have stored your code in the previous step. If you have not used GitHub combined with Azure DevOps before, it will ask to sign in to GitHub to authorize the connection. In the next screen, select the repository where your code is stored.
Now, you have the option to use an existing Azure Pipelines YAML file if you already have one. We are going to create it, so select Starter pipeline.
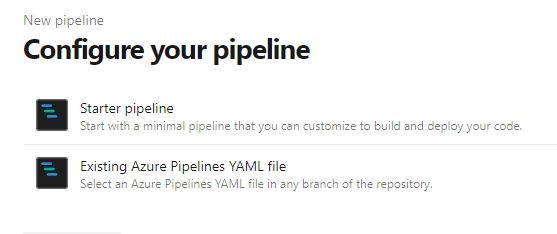
A basic YAML file opens.
Start the YAML file
One thing is very important to know beforehand and might not be intuitive if you are used to working with JSON and/or PowerShell:
With YAML for a pipeline file, indentation and capitalization matters! The code will fail if you get it wrong.
Some elements are already filled in in the YAML file. The nice thing about the web interface is that you will have intelliSense to help you write your code. This is what that looks like:

Set up the starter code for the pipeline
For now, remove the code on the screen and replace it with this code:
This means the following:
- Trigger: The pipeline will be triggered by every commit to the main branch of the git repository
- Variables: We set the resource Group Name and location at the start of the pipeline, so we can use them later. Change these to what fits your environment.
The resourcePrefix is the start of the name of all resources that will be deployed. We add it here to add some flexibility. Change this if needed, but keep in mind the maximum of 5 characters. - Stages: This pipeline is a multi-stage pipeline
- Stage: The first stage is called Build
- Job: The first job is called preparation
- pool: De image that is used is the latest version of Ubuntu on a Microsoft-hosted agent. You should be able to run this pipeline on a Windows image without issue if you prefer that.
Add the steps
Now that we have the base set up, we will add the steps to actually build and deploy the template.
Build an artifact
We start a new job called build. In this job, we will build the ARM template that would be created by the bicep file. We store that file as an artifact in the pipeline. By doing this, you can go back into old pipelines and see exactly what code was being used at that point of deployment. It can also be useful if you want to do something else with the ARM template, like run automated tests or add it to Template specs.
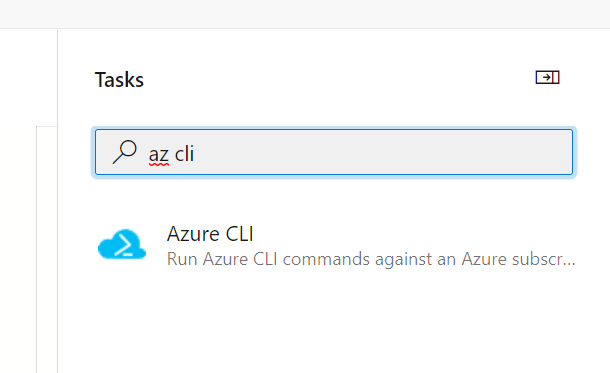
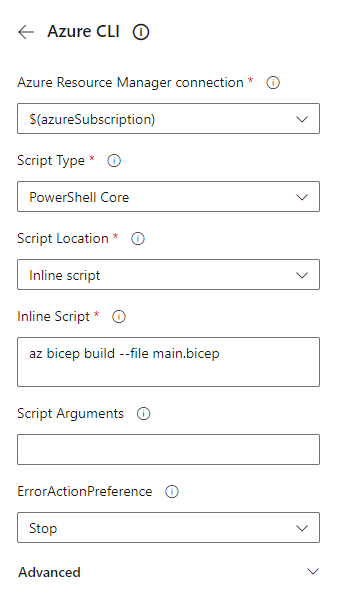
To build the template, we will use the Azure CLI. You can create the task by searching for the Azure CLI default task in the assistent.
You can use the fields to create the following YAML task:
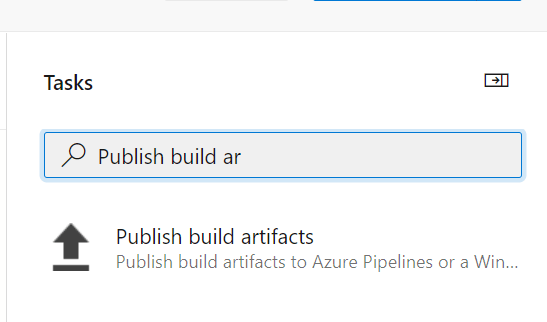
In the same job, you create a task that stores the artifact in the build. You can use the default task Publish build artifacts to do this.
Your task should look like this:
Optional additions: tests and checks
If you want automated testing in your pipeline, this is where that would take place. I recommend you invest time in that aspect. If you have already standardized tests for you ARM templates, you can keep using them as you create an ARM template in the previous task. To find out more about ways of testing your arm templates, find my previous post on Testing ARM templates or more specifically testing with What-If in a pipeline.
Deploy the template
With the build done, it is time for the deployment. To do this, we create a new stage. That way we have a logical separation between build and deployment, which you could use to set extra requirements or approvals to the deployment stage.
Copy the following code into the YAML pipeline:
This will create a new stage called deploy. This stage contains a deployment job which uses the AzureDeployment environment.
We use the runOnce strategy. The first step is to create a checkout of the repository, which is not done by default for a deployment stage.
Next, we create another Azure CLI step so the bicep template can be deployed. Use the following code:
Note: I think there is a good chance that it is possible to deploy Bicep with the default ARM deployment task in the future. It is not possible at the time of writing this post.
This will create the resource group if it does not exist. After that it will deploy the Bicep template.
For the deployment, the template is main.bicep and the parameterfile is main.parameters.json.
The parameter resourcePrefix is overwritten in the pipeline to add flexibility.
We are now ready to deploy Bicep with Azure DevOps pipelines! When you save the pipeline to the main branch, it will start running, create an artifact and deploy all resources to Azure.
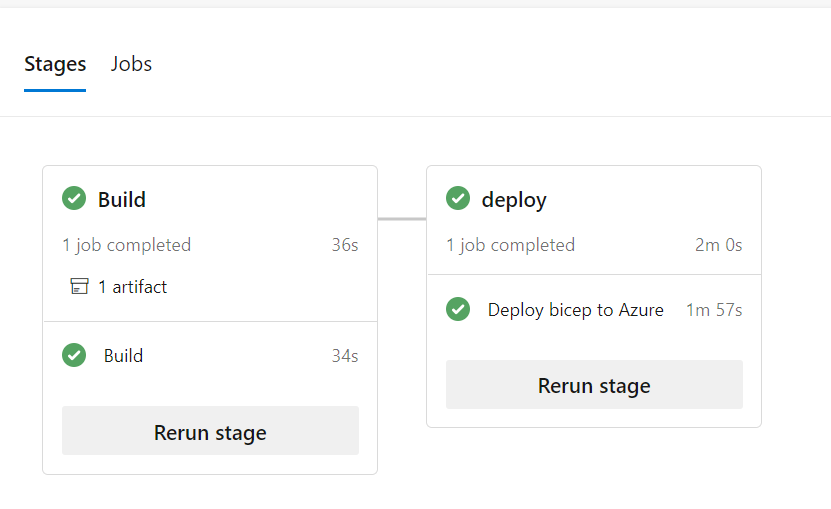
You can run this on either Windows or Linux agents, both will work.
Conclusion
So this is how you deploy Bicep with Azure DevOps pipelines. As you can see, deploying bicep is very similar to deploying ARM templates. As I said before, there are different ways to reach your goal and I do recommend to implement some testing into this pipeline.
The completed YAML file for the pipeline can be found here and the complete repository that is used can be found here on my GitHub.


Thanks for the write-up! We’ve been deploying Bicep directly with Azure CLI without building it first. We haven’t considered testing the ARM output though, so we’ll be investigating if that will help us.
I noticed your note I think there is a good chance that it is possible to deploy Bicep with the default ARM deployment task in the future’. Do you mean the ARM deployment task can’t deploy the ARM template generated by the Bicep build or do you expect the ARM deployment task to be able to deploy Bicep directly?
Hi,
The last option. You can already use the task to deploy the ARM templates that are build through Bicep.
But I think it is an option that you can deploy Bicep templates through the default task in the future, or that a dedicated default task will be created. This is just a guess from me though, I’m not aware of anything happening at this point.
Thanks for your comment!
Great tutorial! After some playing around I managed to deploy the Repo to GitLab, have that repo mirrored in Azure DevOps, then have a pipeline configured to the azure-pipeline.yml in the AzureDevOps Repo.
Pingback:Top Stories from the Microsoft DevOps Community – 2021.04.23 - Power Community
Pingback:Step-by-step: Deploy Bicep with Azure DevOps pipelines – 4bes.nl – Don Hackman
Pingback:Top Stories from the Microsoft DevOps Community – 2021.04.23 - Microsoft Today
Thanks for this guide. Just what was looking for and I managed to publish my first bicep templates via a DevOps pipeline this afternoon :). Greetings from Zwolle
Hi, I think I’m missing a step on the Build an Artifact section where you add a task. I’ve chosen azure CLI, but it’s asking for a script type, location, path and location. What would I choose for Bicep?
hi Rob,
When you use the task assistent, it should look like this:
I haven’t implemented yet, but shouldn’t line 10 of AzDoBicep05.yml end in main.json, not main.bicep? That’s the name of the published artifact in AzDoBicep03.yml
Or am I misunderstanding this?
The deploy step uses the bicep file to deploy, as it is able to deploy bicep directly. So you could use the json as well, but in this case I chose to just build the json to make testing possible and to have an artifact for auditing purposes. If you look at my new post for GitHub Actions, you can see some ways the json file and build step can be used for testing.
Bicep linter shows warning : “Environment URLs should not be hardcoded.”
Solution is to change this:
var privateDnsZoneName = ‘${privateEndpointName}.blob.core.windows.net’
Into this:
var privateDnsZoneName = ‘${privateEndpointName}.blob.${environment().suffixes.storage}’
See also issue on GitHub:
https://github.com/Ba4bes/AzDo-Bicep/issues/4
Thank you Stef, for letting me know. This has been fixed in the code!